
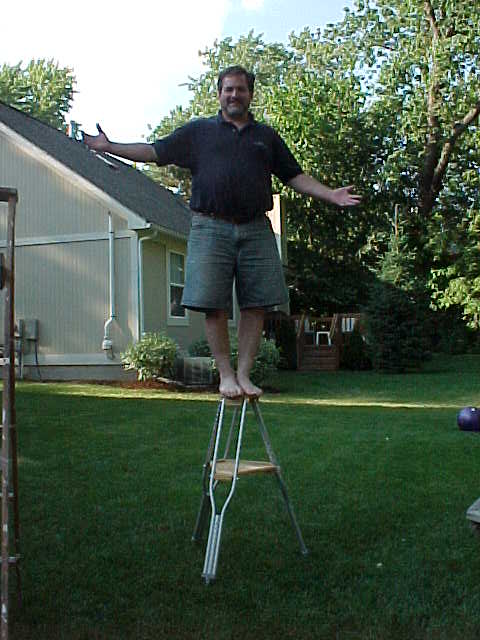
Reading Ernie Pfannenschmidt’s article in the April 2003 issue of Sky and Telescope about using crutches to make a tripod brought back memories of many similar tripod articles from years gone by. I decided to build one of my own to replace a pedestal I had built for a 5” f/5 refractor.
The pedestal I had built, though good looking, suffered from a horrible case of the wobbles, and took several minutes to put together, considering its small size. I wanted something quicker to set up and, of course, more stable.
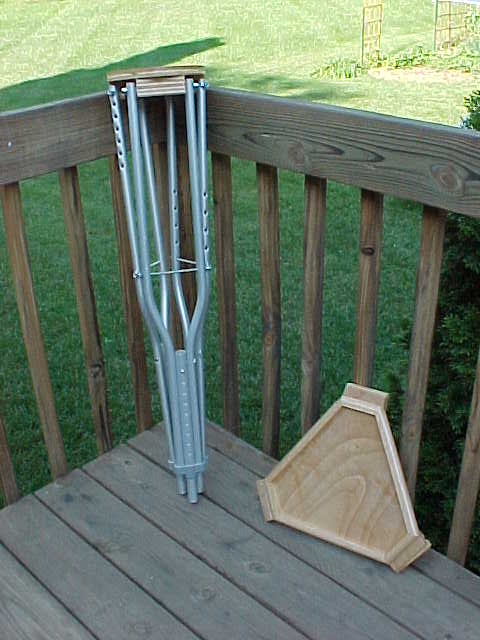
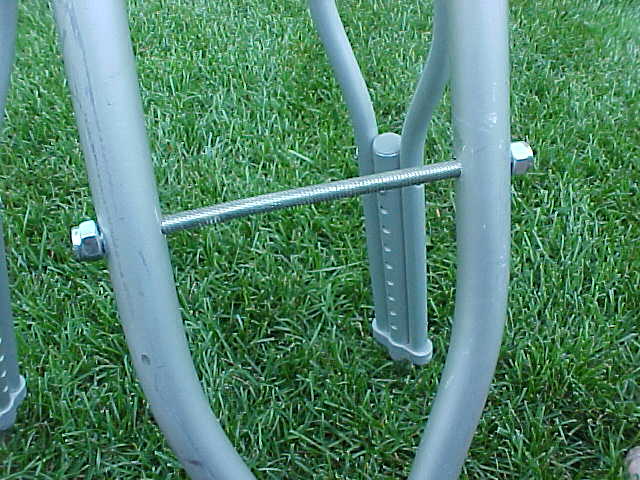
Mr. Pfannenschmidt’s tripod used old fashioned wooden crutches. I employed metal units that are common today. They quickly adjust for height with just the push of a button. These were purchased at the Reuse Centre of Recycle Ann Arbor for 4 dollars a pair. Except for some Ă‚ÂĽ” oak plywood used to make the tray and Ă‚ÂĽ” threaded rod and bolts, all other materials were left over from the old pedestal project and some home remodelling. The tools used were a power hand drill, router with circle cutting guide, sabre saw, a “chop” saw (bought for the home remodelling job) and a drill press at my place of work for drilling a few holes square to the board. A cheep drill attachment available at most hardware stores could sub for the drill press. |
Pictures are better than words, so I will let them explain most of the details.
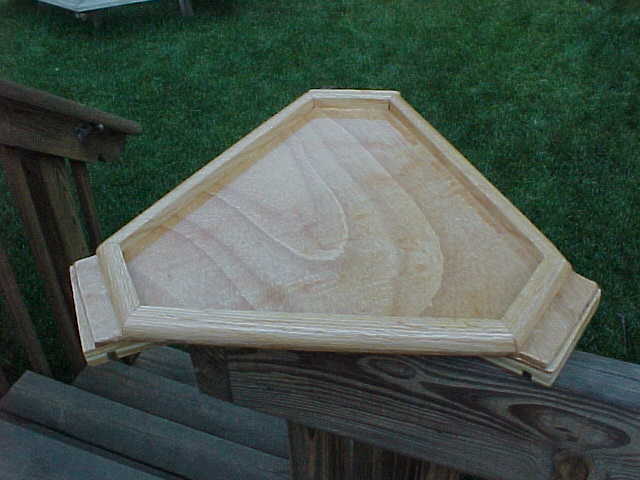
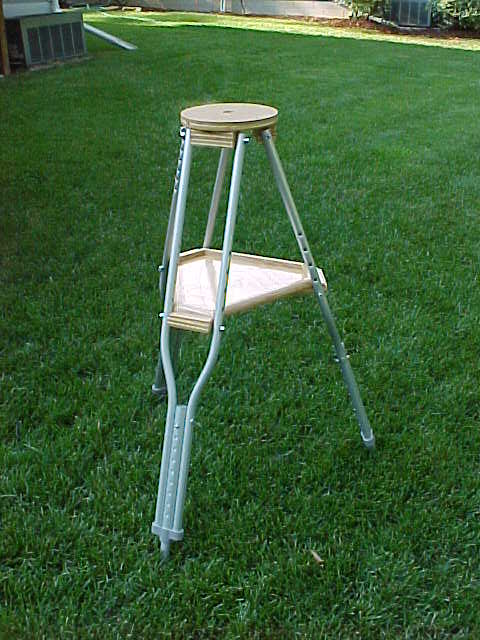
The tray (fig4) is made from Ă‚ÂĽ” plywood and some quarter round trim. |
|
|
Figure 4 |
|
|
|
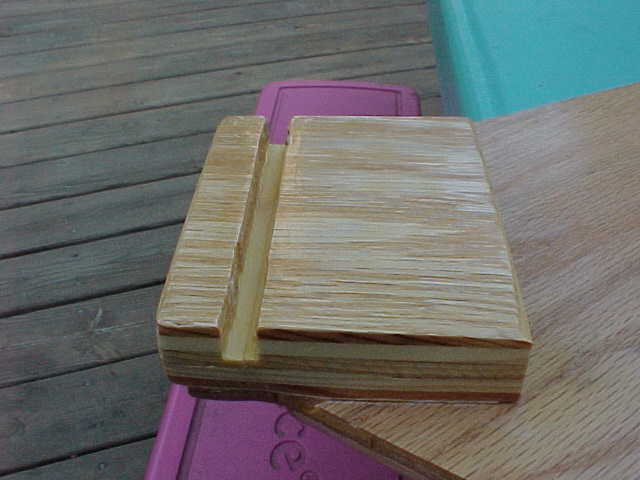
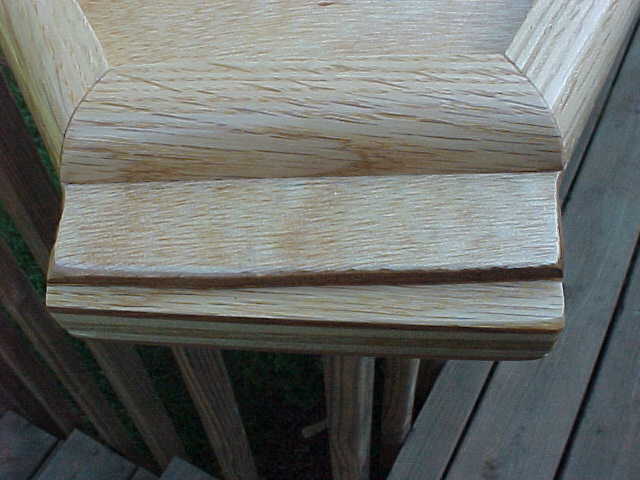
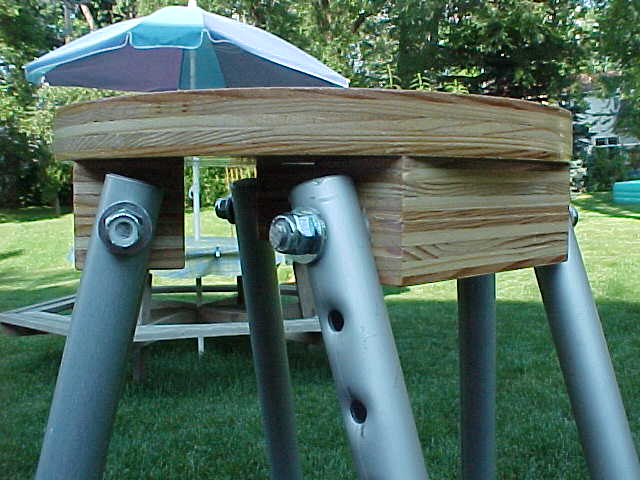
The tripod top (fig5) is a single layer of Ă‚Âľ” oak plywood 8” in diameter. |
The cost of the whole thing was under 25 bucks. Hardwood plywood is not real cheap. If one could not scrounge up the pieces ordinary plywood may be a better choice. If you have a whole day to yourself you could build it. |
Links
Do you have comments about this page or want more information about the club?
Contact Us.
Copyright © 2005, the University Lowbrow Astronomers. (The University
Lowbrow Astronomers are an amateur astronomy club based in Ann Arbor, Michigan).
This page has been reposted here with the permission of Doug Nelle.
The original article can be found here
This page originally appeared in Reflections of the University Lowbrow Astronomers (the club newsletter).
You must be logged in to post a comment.
Help us continue our work with a donation
 Forum {beta} Forum {beta}Hatch ideas and help others with their ideas. |


18 queries. 0.186 seconds
December 24th, 2005 at 1:32
mmm. I think ill pick a real one off of ebay, I dont like the look of that one lol, and a bit bulky if you like to travel around while filming (like me)
September 11th, 2006 at 3:59
hello brother,
Iam baiju from India. Iam a story board artist. now working in Dubai. I appreciate your creative job. Its excellent man
January 15th, 2007 at 18:13
just wanted to say of all the home made tripods ive seen, yours was the best looking, and the strongest looking. im going to try and build one myself as soon as i can find some old crutches. thanks alot for the good tip and for the photos, take care
January 20th, 2010 at 8:30
i am kuttu……..
i am really appreciating your creative skill…….
keep goin……
March 24th, 2010 at 17:09
My grand father was an amazing guy. Cool that you used his ideas to build something.