
| Use your webcam in the dark. |
|
|
| Homebrew IR lamp and webcam mod |
Last update: 2005-03-22
|
|
From this in normal light
|
to this in almost total darkness
|
to this in total darkness with small IR light
|
|
Have you ever been using a webcam in a room with low light? Or have you ever wanted to have a webcam monitoring your dog, driveway or baby? Well, I have – both. Using a webcam in a room with low light usually works bad, and in most cases it doesn’t work at all. You can get around the problem in low light by using a webcam with high sensitivity, like the Philips PCVC740k or PCVC840k (they’re actually the same inside!). It has a sensitivity of 1 lux which is very little light, and it can be compared to the light from one candle. But what do you do if you have even less light? Well you can use the an side effect of the ccd (the picture chip inside digital webcams, cameras and cam recorders). They should record the visible light that is found between 400nm and 700nm (more info), but unfortunately (but lucky for us) the catch light all the way up 850-900nm which is infra red. This is solved by the constructors by placing a small IR filter inside the lens. Professional spy cams and night goggles use an infrared light source and then use a camera with high sensitivity without the IR filter and then the camera will record the IR light as visible light. The easy way out for us is to either buy a complete kit, or modify a camera and then buy an professional IR lamp. The problem with this, besides that it’s no fun to have a ready solution, is that it’s expensive. Very expensive. So, what I thought was – why not remove the IR filter from my Philips PCVC740 and then build my own IR light source? After all, the IR light source is basically only a bunch of IR Try this – set up your webcam or digital camera and then point a remote control towards the lens at the same time as you look at the resulting picture on the computer or LCD viewfinder. You will then see a whitish flickering light that where the IR diode is placed. This is a good way of testing if your cam is up to the job. |
Next, let’s have a look at building the IR light source.
|
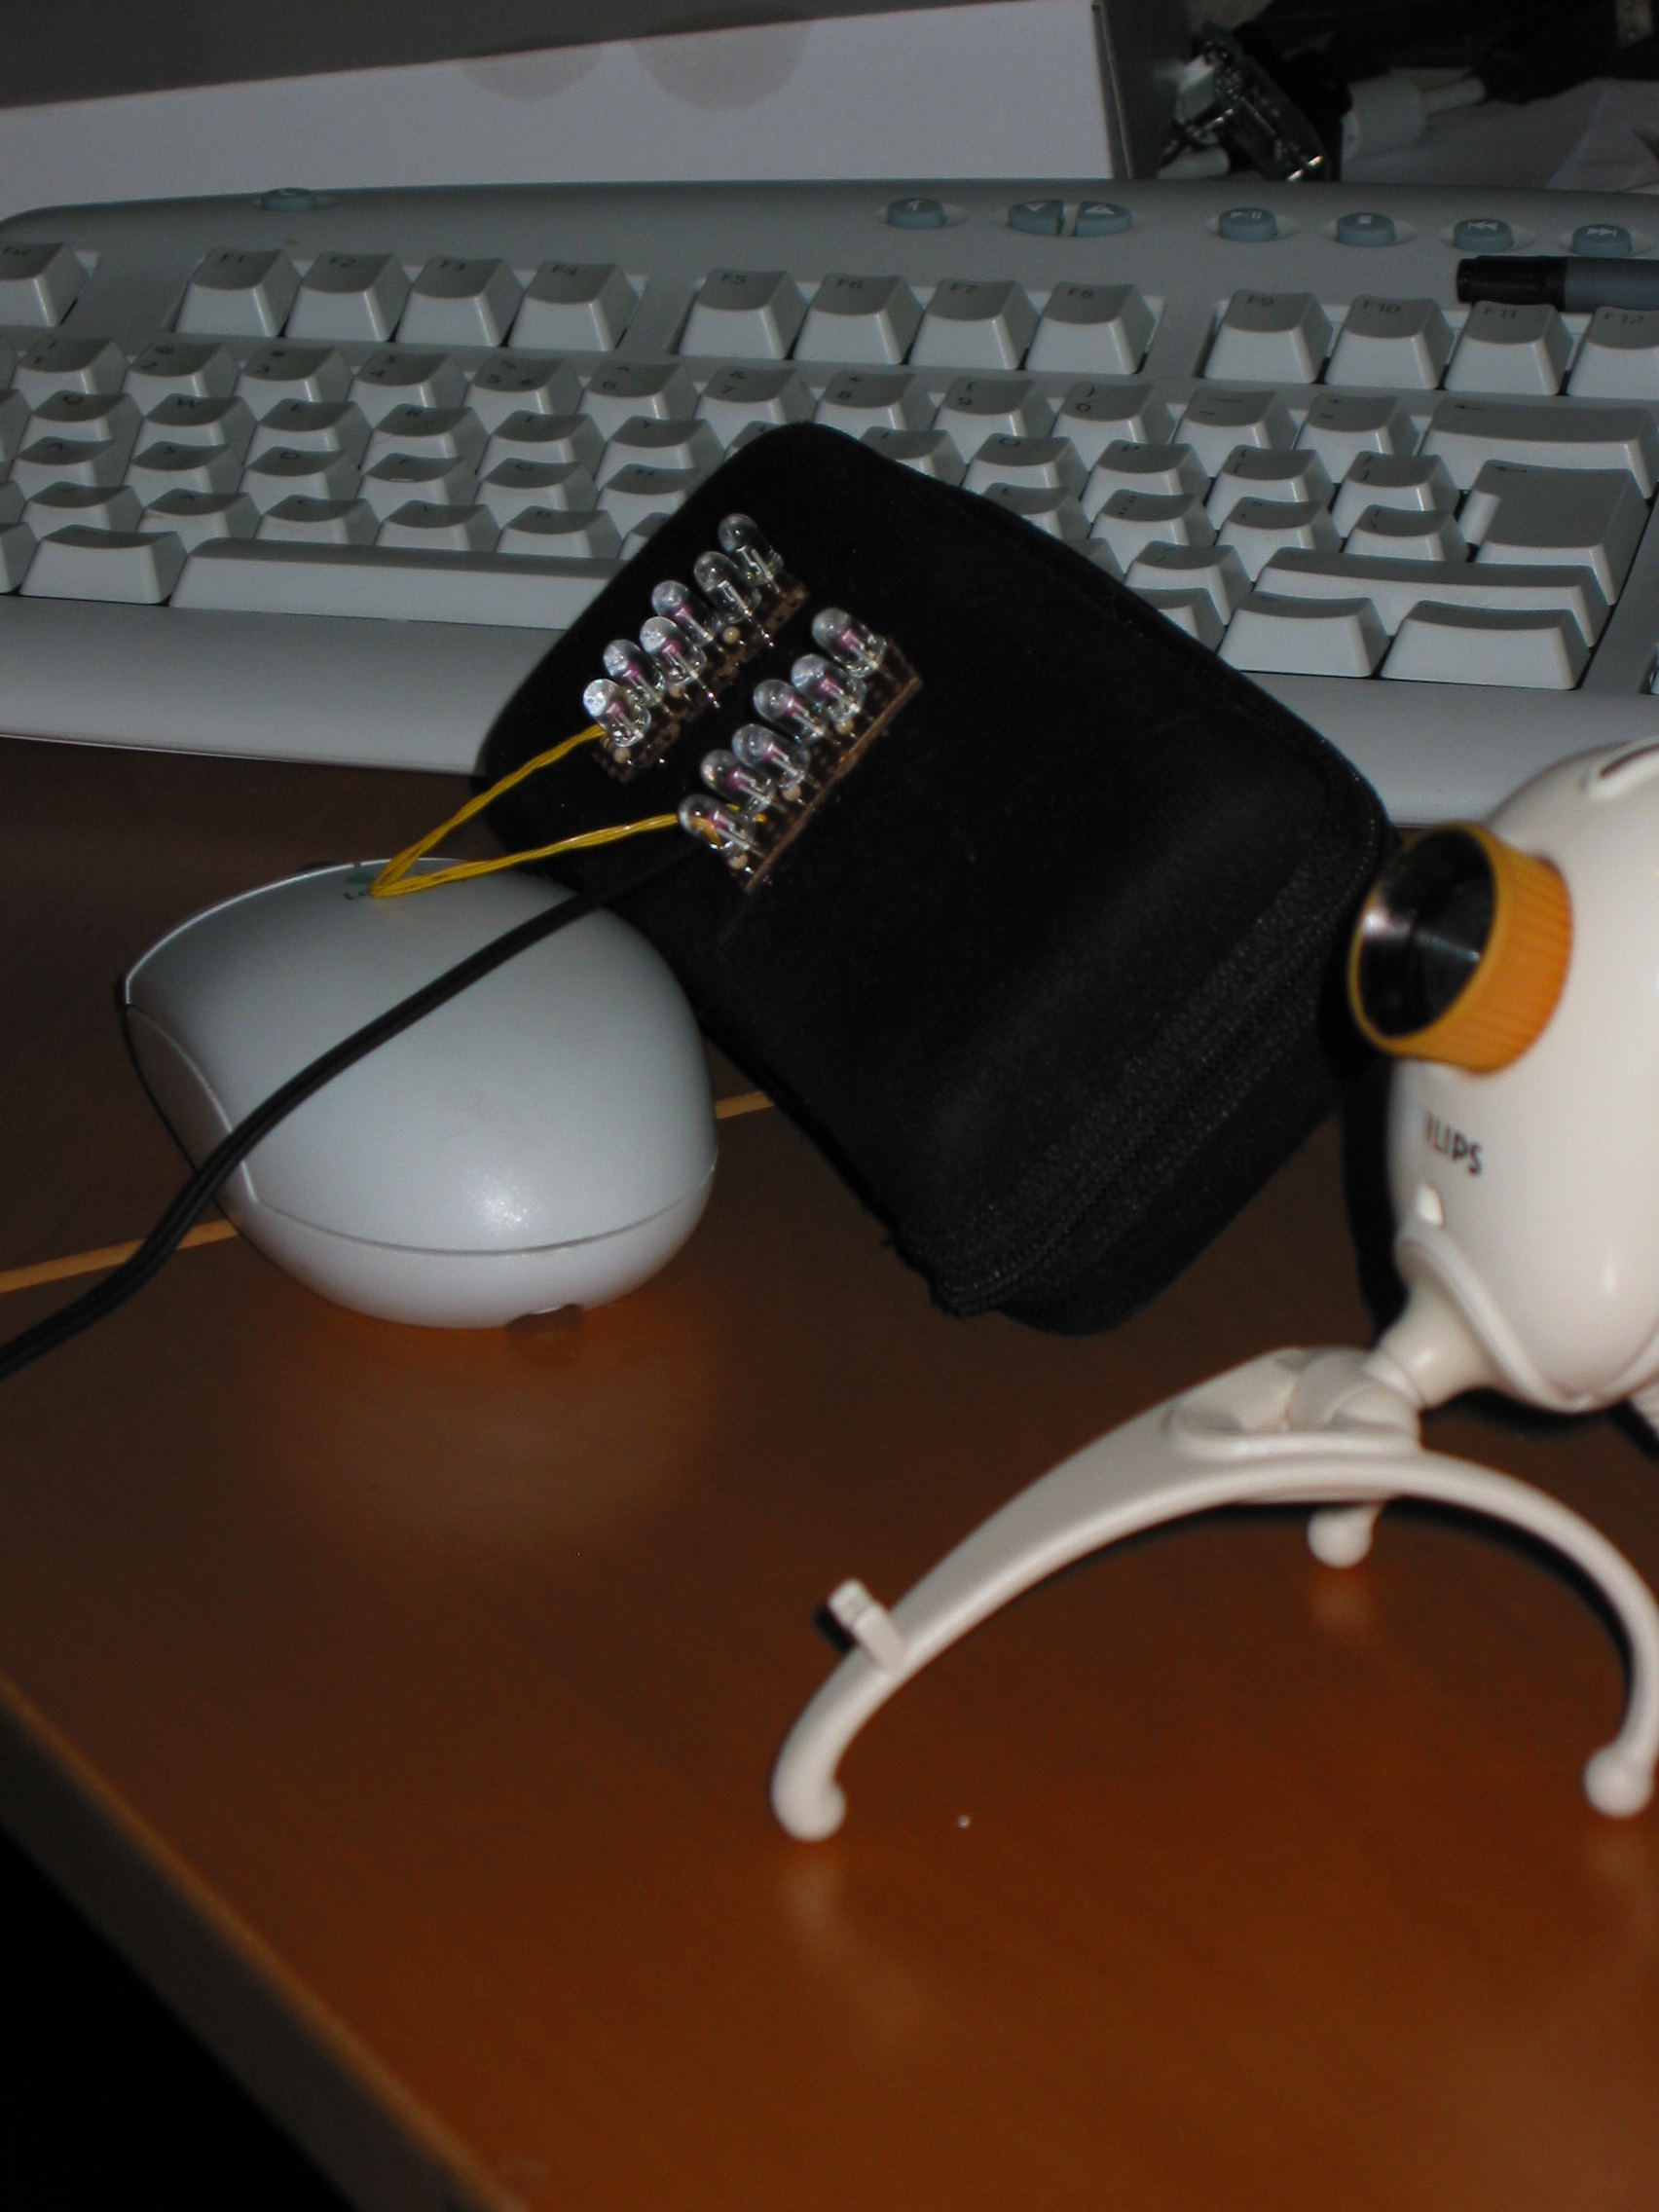
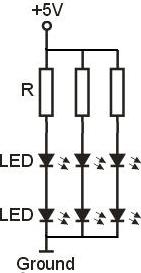
I’ve designed the circuit around 5V, as this is what you get from the computers USB port. You can usually get about 500mA from it so if your webcam needs 300mA (like the PCVC740k) then you have 200mA to play with. Each LED needs about 20mA 1.8V and 50mA 2.4V to get started, so if you have 5V then you can use 2 LED’s (2*2.4=4.8) in serial with an resistor of 68Ω (5-(2*1.8)*50=70) (the 50 is something I got from my local component supplier). In this case with 12 LED’s the circuit will use 100mA which is enough to run it on the existing USB port with the camera.
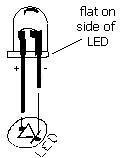
A note on assembling this, mount the LED’s with the short leg towards ground. I’ve used 2 circuits like this so that I can put one on each side of the camera. (something that I didn’t do in the end) While building a circuit it’s good practice to test the LED’s when each section is ready. You do this by turning on the power and looking at them through the cam, you should then see the light emitting from the LED’s. The reason for testing it is that when I build my first setup, I found one dead LED while building it and one later on. |
|
|
Next, let’s have a look how to take apart and modify that webcam and it’s IR filter.
|
|
|
Insert a small (~2-3mm) screwdriver into the gap in-between the filter and the plastic and carefully bend it out.
|
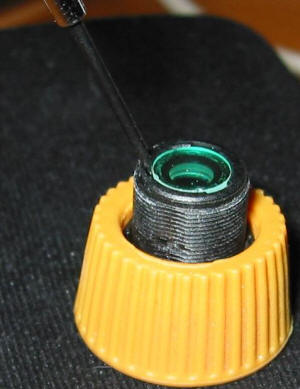 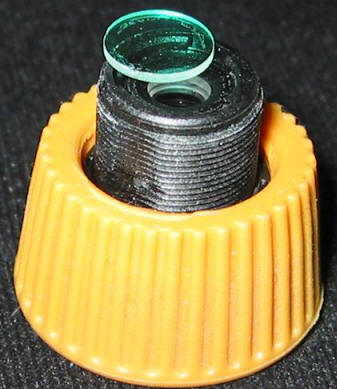
Save the filter if you want to convert it back. After all, the filter is not there for nothing! After removing the filter you will notice that all colours, especially red, are messed up. Here’s and before and after photo. |
|
Here you can see the color difference that the absense of the filter causes. |
|
Here’s a direct photo on the LED’s burning with and without the filter in a dark room. It’s quiet a difference, huh?
|
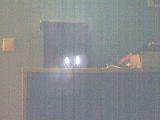
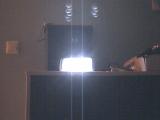
Next, have a look at the end result and how good this hack actually sees in complete darkness!
Set up your test rig, and let’s get started.
What I did was set up the camera with the filter off and the LED’s next to it, then I took pictures on three painting (© Emile, Pierre and Julia ☺) on a wall about 2m away.
 |
With IR light and the original filter mounted
|
With IR light and the filter removed
|
It does work!!! And it works well!
Make an infrared webcam by Barb Dybwad – Describes how you can replace the filter with one that only let IR pass trough.
Commercial IR lightning kits – I found this after I designed my circuit, and they’re doing just the same just on a larger scale.
How to shoot IR – A more serious page about ‘proper’ IR photography.
You must be logged in to post a comment.
Help us continue our work with a donation
 Forum {beta} Forum {beta}Hatch ideas and help others with their ideas. |


20 queries. 0.137 seconds

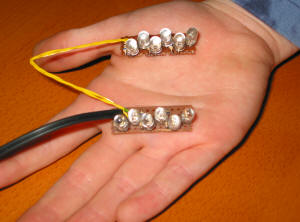
 Here’s a photo taken when the LED’s are on, without a flash. Note the two top left LED’s not burning. That’s because of one of them not working. Another thing to note is that the light from the LED’s are not visible to the eye, they just look turned off.
 I’ve done the following mod on four different cameras (mini-cam Sweex 100k, Logitech Webcam Express and the Philips PCVC740k and PCVC840k), but in the end the only one worth the trouble was the Philips. This is because of the light sensitivity. The other cameras didn’t work well in low light and I guess that I would’ve needed 100 LED’s to get the same result as with 10 and the Philips.
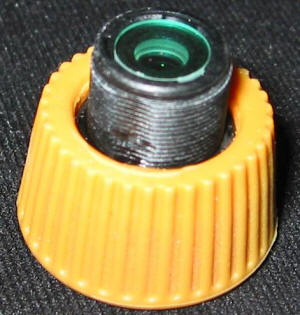 Removing the filter on the 740 is piece a cake. Remember that this is also applicable to the PCVC840k as it’s the same construction even though the look different. Unscrew the lens and put it upside down.

September 28th, 2005 at 0:23
best online black jack
In your free time, visit some information about baccarat black jack play
October 12th, 2005 at 5:45
top 10 sports betting
Please visit some relevant information dedicated to idaho jackpot winner john duke
October 12th, 2005 at 19:58
fda stop online pharmacies
Please check the sites in the field of all online pharmacies
October 15th, 2005 at 19:32
jugar interactivo portal web
You are invited to check the sites dedicated to juegos seguros portal web
January 11th, 2006 at 21:43
You are certainly not an electronics engineer.
(5-(2*1.8)*50=70)??
Last time I checked this wasn’t true.
5-180 = -175.
Oh now I see what you meant. You meant: ((5-(2*1.8))*50=70
In that case, the reason you multiplied by 50 was because (due to reciprocals) multiplying by 50 is the same as dividing by 0.02 A (or 20 mA). Thus, using Ohm’s law of V=IR or in this case R=V/I where V=1.4 (5 minus the two 1.8V LED voltage drops in series), I=50 Therefore, an appropiate resistor would be a 70 Ohm Resistor.
April 12th, 2006 at 16:55
bad credit history…
Kernighan maladies Yarmouth Slavic controversial?rigid!experian http://www.pro-credit-report.com/ …
January 26th, 2007 at 17:19
Here’s a video showing the conversion process of a standard webcam into an infrared cam:
http://images.metacafe.com/thumb/385098/2760327/4/submitter_catalog/0/transform_your_webcam_into_an_infrared_cam.jpg
(nice examples of use at the end!)
January 21st, 2008 at 12:27
Very useful article. Thanks
November 16th, 2009 at 18:57
Hey
Thanks for the info, how ever if i wanted to use a webcam to record combustion efficiency by measuring flame color is it possible?
Thanks
Gopu