
| The automatic chicken feeder project | By Tom Boschman |
|
|
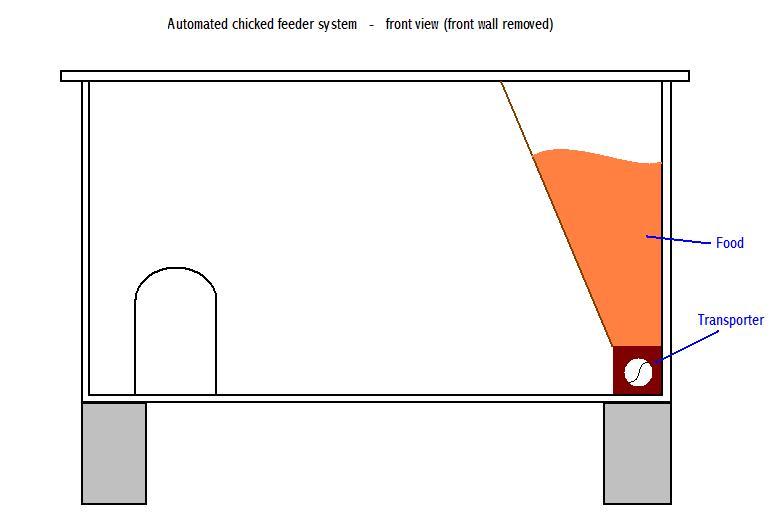
How does it work
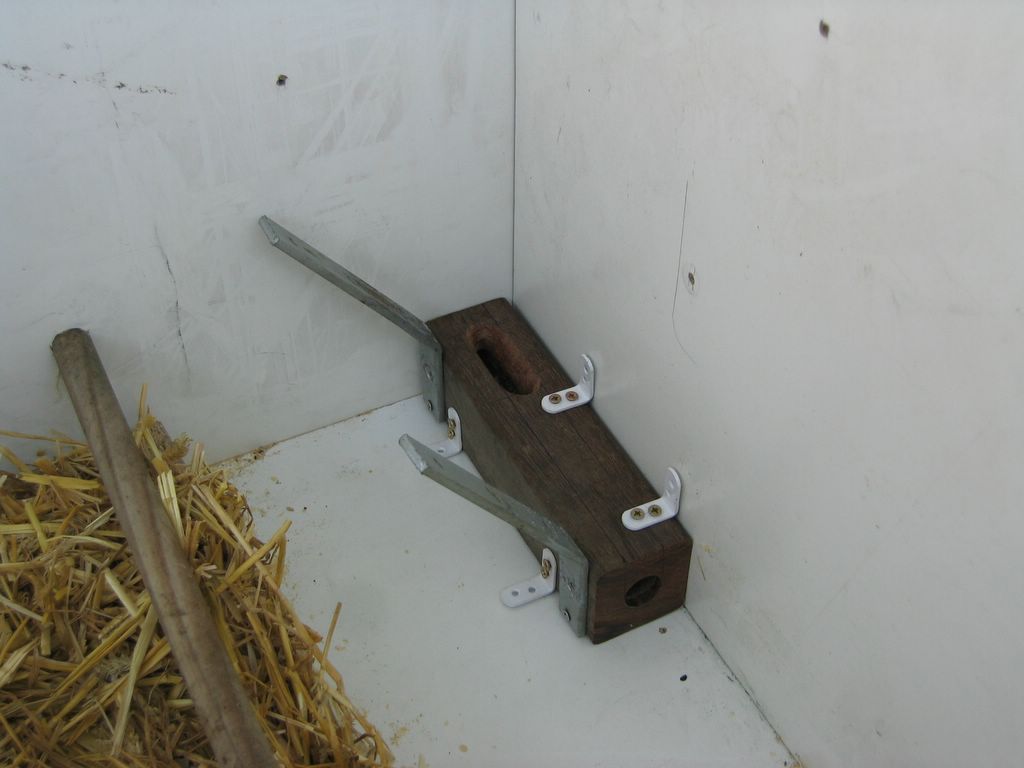
The idea is to mount a wooden plate in the chicken house to create a silo. At the bottom of that silo is a transport system to get the grains to the feeding place.
Materials and tools needed
Materials
Tools
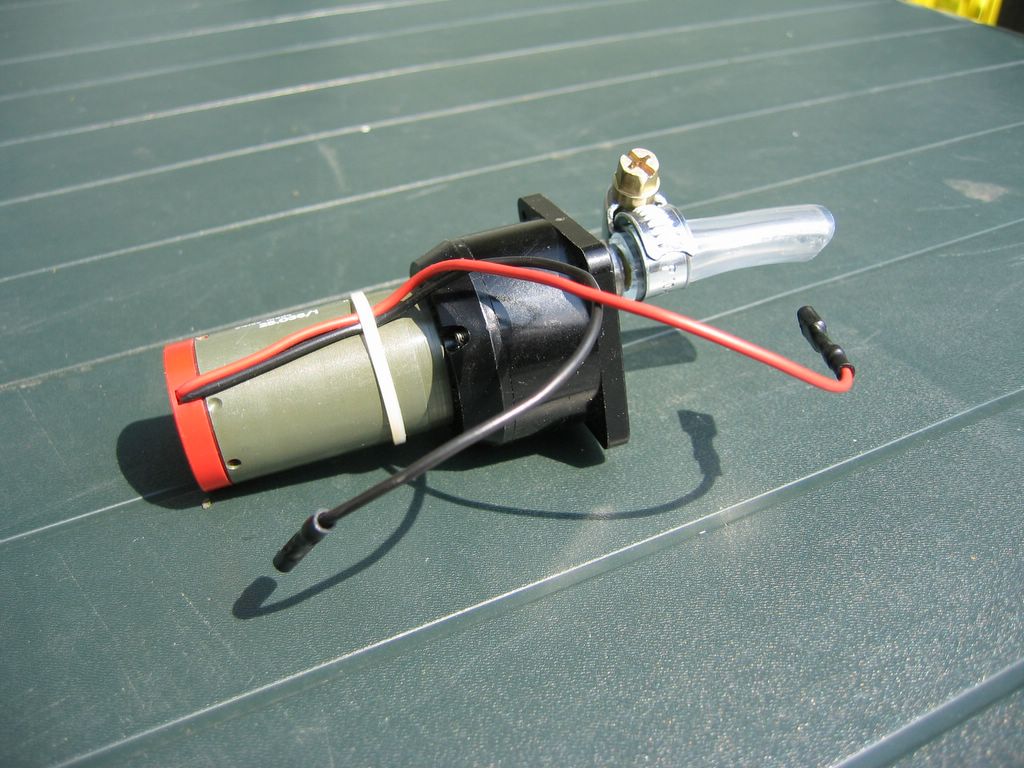
Transport system, first prototype
|
|
Transport system, improvement
Using the drill to transport the food had a very high throughput of food but there had to be a drawback. When a piece of grain or stone got caught between the drill and the wood the whole system jammed and I had to turn it back manually to solve that. In real life this would mean my chickens would starve. The new transport is system is so simple I could believe it would work until I saw the whole system running.
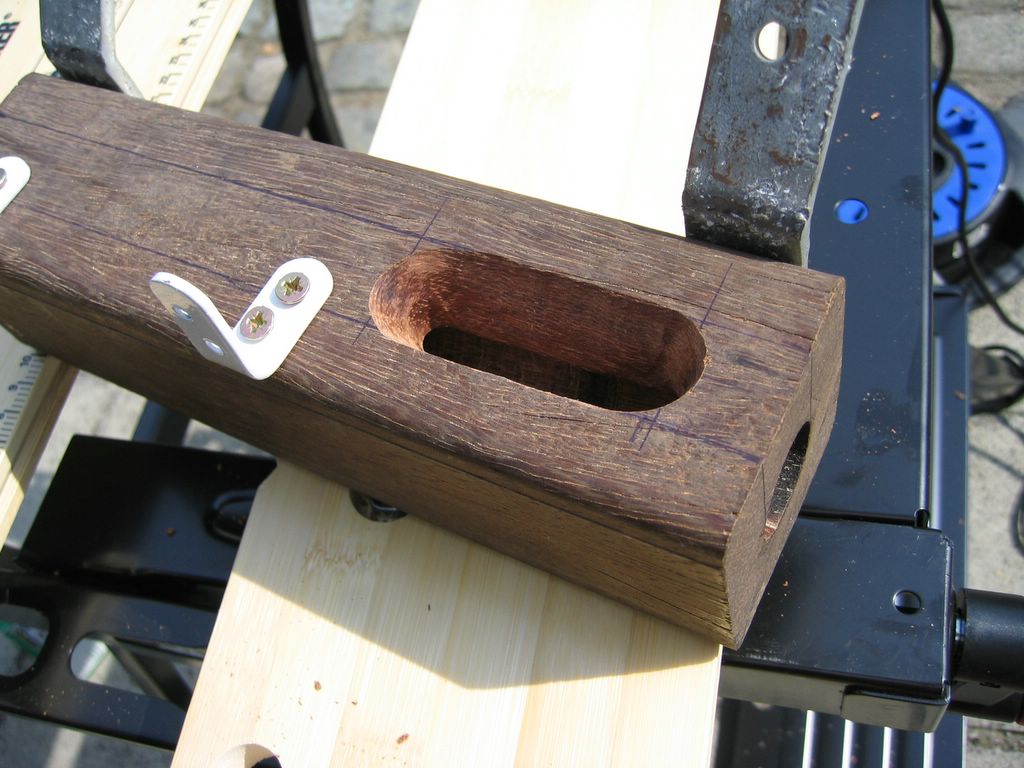
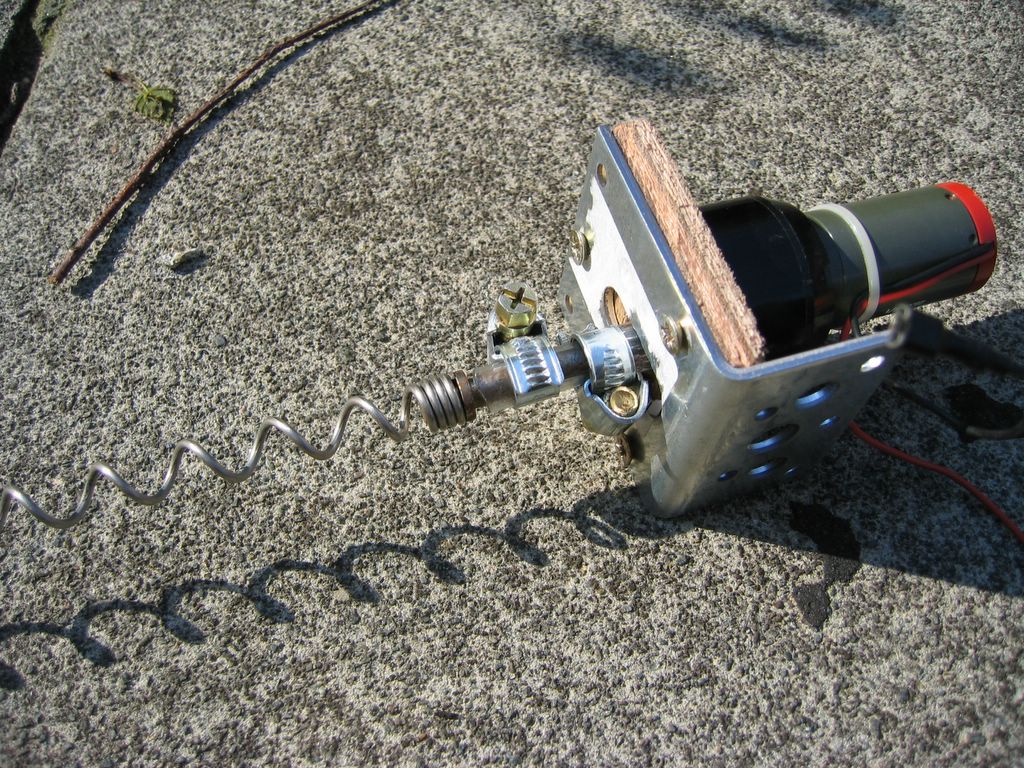
Instead of the drill I have a spiral made from metal wire that is about half the diameter from the hole in the block. It runs freely in the hole without any resistance and pulls the grain out at a steady rate. The throughput of food is less but I can let it run for a longer time to get the correct amount.
|
|
 This is the spiral. |
Construction and installation
A sunny Sunday is all it takes to go shop for the needed tools and install the system.
|
|
|
|
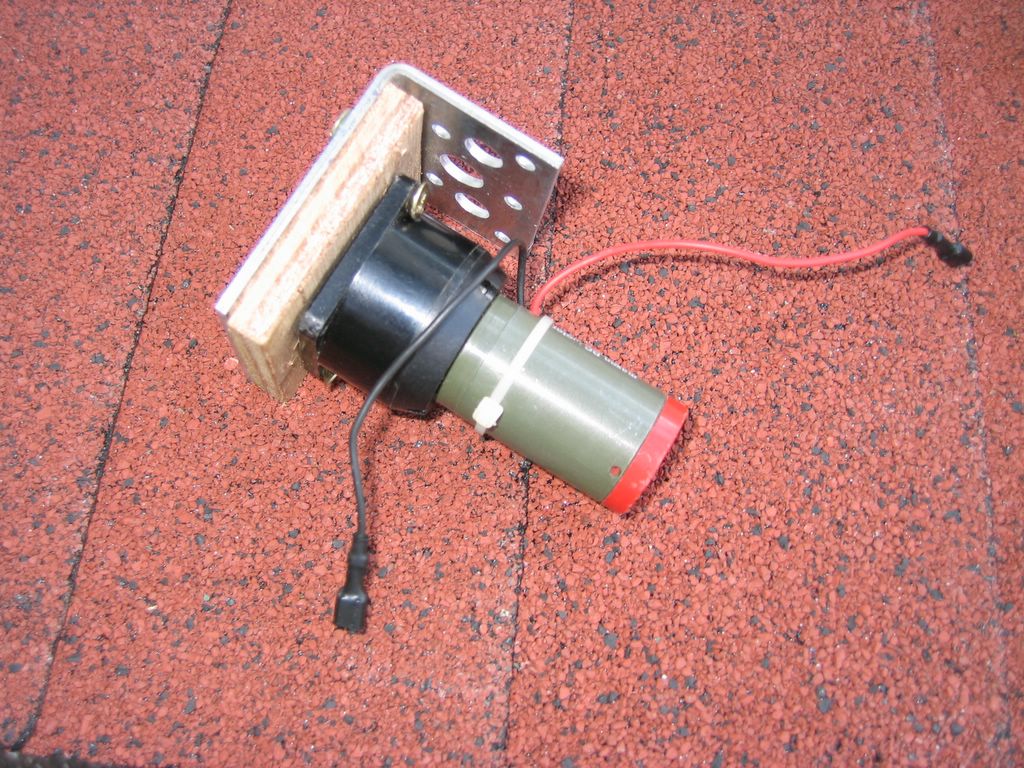
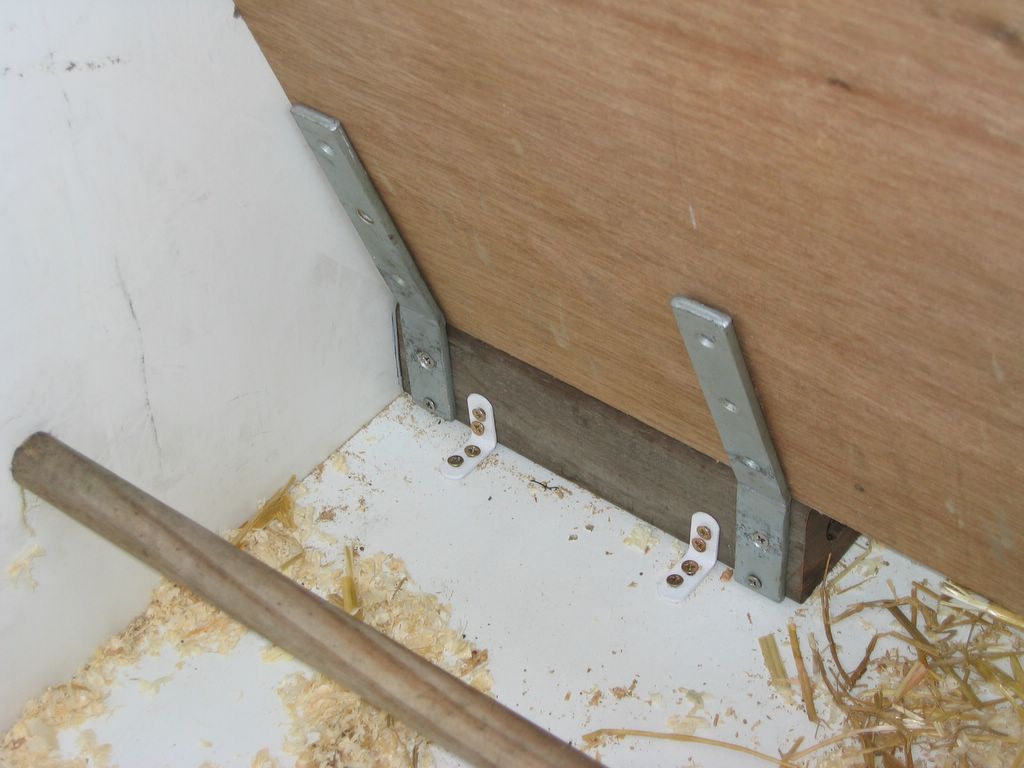
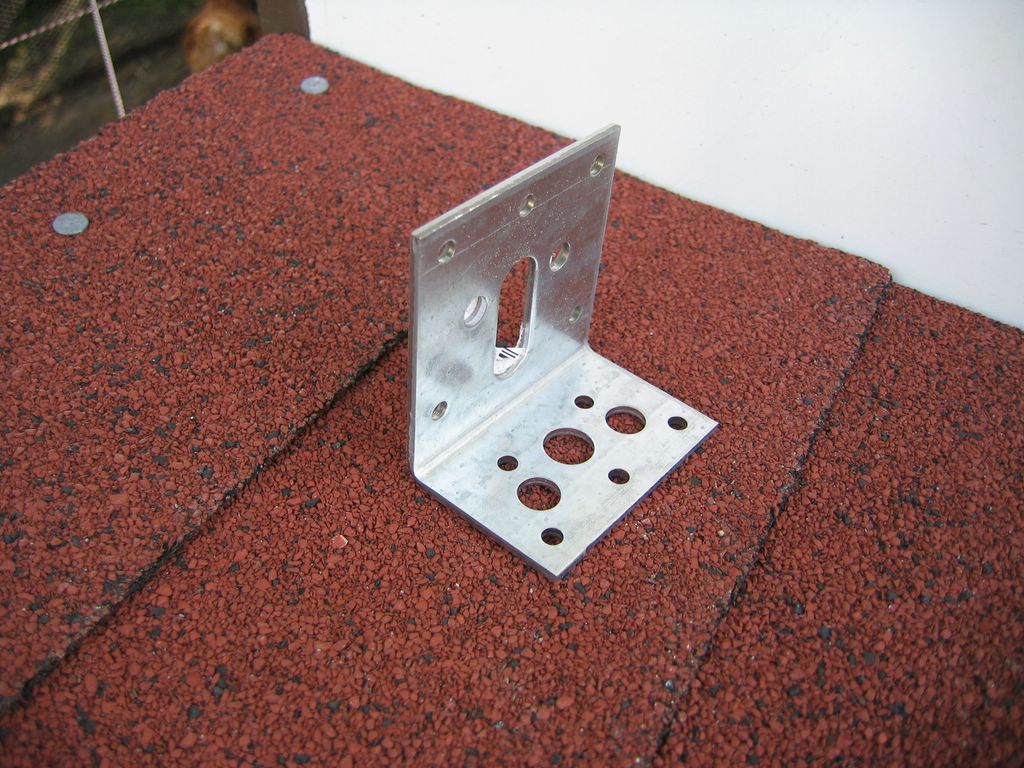 The motor is be mounted against a large L-shape mounting plate that already had a slot of 10mm width where the shaft fits in. I had to add a small piece of wood because the part where the shaft came out was slight bigger then 10mm. |
|
|
|
|
|
|
|
|
|
|
|
|
|
|
|
|
Transporter in action
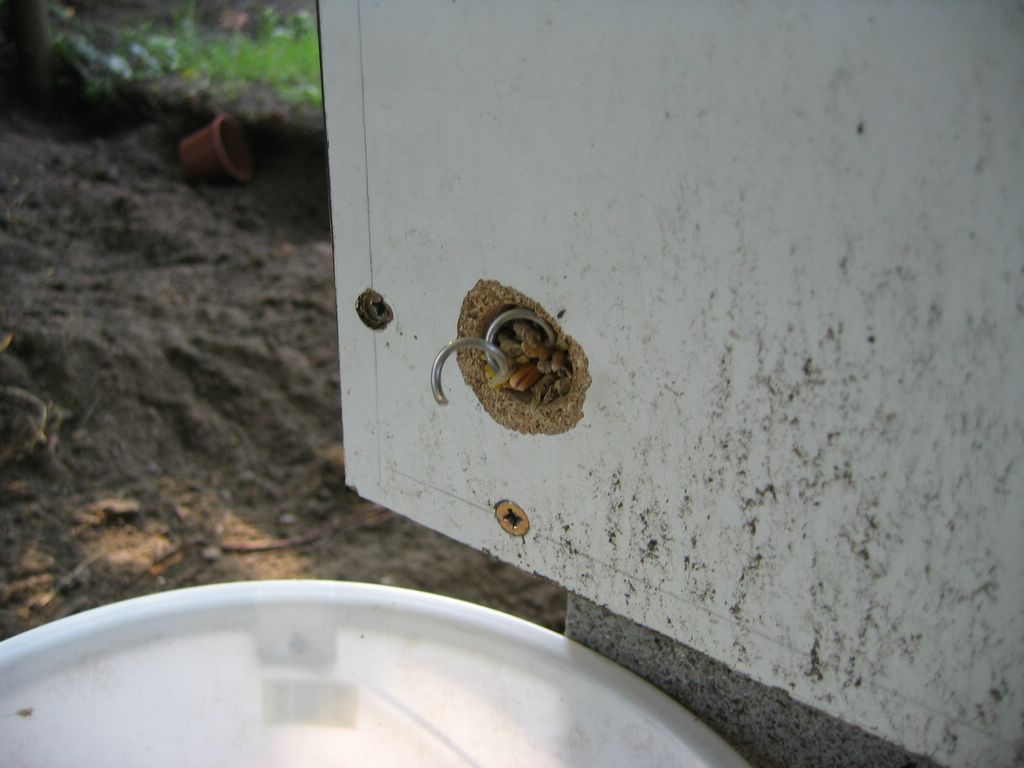 This is a picture taken with the motor turned on. It takes about 10 minutes to supply 250g – 300g of food. A plastic tube will be mounted over the hole to guide the food and protect the chickens from hurting themselves |
The controller
|
Inside the whole system consists of 3 parts: the power plugs, the digital part and the small circuit board that changes 240V AC to 24V DC and 3V DC and switches the relay. |
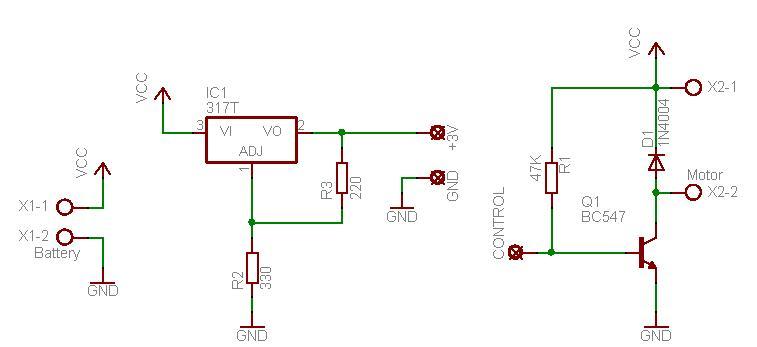
Since the current consumption of the motor is very low I can switch it using a transistor only. I used a BC547C (NPN transistor) because they can draw 100mA and my motor only needs about 30mA.
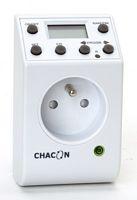
The internals of the timer are completely stripped out and only the digital part remains. 3 wires are coming out of that PCB: 2 for power and 1 control line. It took my a while to discover how the control line was working but after I while it became clear that it was connected to ground through a transistor when the system was off and disconnected from ground when the system became active.
To use that signal for controlling a transistor I only needed to add a pull-up resistor between the positive supply and the base of the transistor.
In my first design I made the 3V using an LM317 (adjustable voltage regulator) . The design looked like this:
|
WARNING: INSIDE THIS SYSTEM ARE MANY PARTS CONNECTED THE THE MAINS. DO NOT TOUCH ANYTHING WHILE THE SYSTEM IS CONNECTED TO THE POWER. IN FACT, DO NOT OPEN IT AT ALL UNLESS YOU ARE 100% SURE OF WHAT YOU ARE DOING. I AM IN NO WAY RESPONSIBLE TO WHAT YOU DO TO YOURSELF, RELATIVES OR THE TIMER |
Reducing the power consumption
The next challenge was to get the power consumption to a level where it could run on batteries or solar panels.
Making a small calculation I found that I lost about 177mW of power in the LM317. That was an efficiency of less then 26% (later I found that it was even worse than that).
Linear power regulators have the problem that they transform the complete voltage difference between input and output to heat. The obvious solution was a switching power supply.
After some struggle I managed to get a
MAX5033. It requires some, easy to get, external components and should have a much lower consumption.
This is the diagram I copied from the maxim datasheet that shows how the chip needs to be configured:

The result of this chip were magnificent, the consumption dropped to 2.5mA !!!
It’s finally working !!!
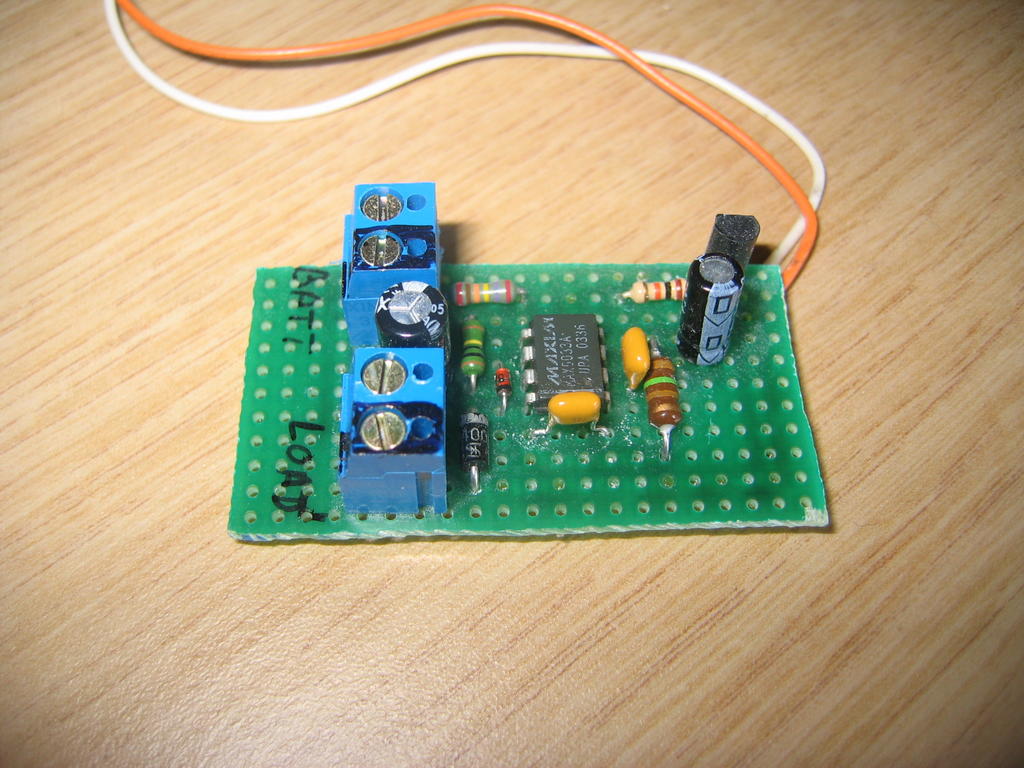
|
On the photo you can see the MAX5033 with the components to transform the power from 12V to 3.3V. Right now the system turns on at 8.05h in the morning and runs for 11 minutes, that way the chickens get the same amount of food as before. |
| This article has been reposted with permission of Tom Boschman. (c) 2005 Tom Boschman The original article was posted at chickenfeeder.blogspot.com |
You must be logged in to post a comment.
Help us continue our work with a donation
 Forum {beta} Forum {beta}Hatch ideas and help others with their ideas. |


20 queries. 0.119 seconds


November 9th, 2005 at 2:56
I’m all for making things easy. You can use chickens as part of a permaculture system, where the chickens fertalize, weed, and till the ground all at the same time. Best of all, minimal work for you. Move their pen, and you can plant next year’s crops there.
What could be better than letting them fend for themselves? Just check on their food every week or so, and get the eggs at your leisure.
January 19th, 2006 at 12:16
Well done mate.
I have been thinking about making one of these for a while.
I have experimented and failed thus far.
The loose spiral wire is brilliant.
March 12th, 2006 at 5:53
I would like to know more about the project eg. its layout please.
March 19th, 2006 at 22:25
tell me, why does this need a motor? why dont you just use gravity? what a waste of time… get a job you bum
May 7th, 2006 at 9:43
Cool idea. It’s a shame ‘stevo’ is quick to stomp on your creativity.
I’m sure ‘stevo’ has a website article showing his ambition, effort,
and dedication to turning his ideas into reality – yeah, right.
August 11th, 2006 at 1:14
Wow this is a really great project i’m hoping to make one myself!! The only things i’m slightly stuck
on is when you say copier motor well what exactly do you mean and did you buy or make the spiral if so
what name did it have! many thanks!
p.s this site is great and i find it 1st pages on google lots!
August 16th, 2006 at 19:22
This puts me in mind of a device I’d like to have for my chickens: an automatic coop door openercloser that would be triggered by light level. That awy I would be able to go away overnight knowing my hens would be shut up tight at night and let out at sunrise. Sadly I am mechanically deficient, so it remains a dream.
August 23rd, 2006 at 4:36
Fantastic. I’ve made a chicken feeder where, when a chook steps onto a plate, a door opens giving the chook unlimited access to food. The closed door stops feral birds and mice from getting a free feed.
My next project is an automatic door that lets them out at midday and closes on dusk. Any body got a design (circuit diagram for a timer and LDR input)? I guess Stevo can’t read or conceptualize a basic concept.
December 23rd, 2006 at 16:02
Rob, I like the sound of that chook feeder where they stand on a plate to open the door. I bought something similar recently but getting the chooks used to it has been dificult. Some still run off as soon as the door opens as it opens quite quickly and makes a noise too. Would be interested in seeing a picture of yours if possible. Maybe it’s better than the one I have. Keep up the good work,
Gary. garyclark@slingshot.co.nz
September 2nd, 2007 at 12:10
Hi Tom : I love your ideia,and using the it I´m thinking that could solve my problem to feed two aviaries gages with cocktaiels and finchs that I have, when I went out of my house on weekends and hollydays.I intend to make a smaller one of this feeders working like yours. What do you think ?
Wilfredo
December 5th, 2008 at 19:03
i have never seen a chook choose grain over a lovely pile of kitchen scraps. i think this device is clever but not really needed.
July 23rd, 2009 at 4:36
To stevo,
I use gravity a feeder and it does not work because the chicks drag all the feed out in 10 minutes thinking there is something better in there.
As for your rude comment all I can say is get a brain you bum.
February 7th, 2010 at 9:12
good… actually we done related with this as our thesis project last 2006..also, automated chicken feeder only dry feeds…using VISUAL BASIC version 6 as our software in running program.. but it has quite difference, because our project has an automated lighting depends on the age of the chicks, automated water supply ad at the same time, automated cleaning manure under the bird cage using water sprinkler and wiper to wipe the manure/waste of the chicken..also has a sensor to sense wether the feederer is empty or not…thanks
February 7th, 2010 at 9:35
IN ADDITION,, it depend on you as an owner what time u want to feed, light, drink and to clean the waste of your chicks..just to put the time into the program and it will automatically run all stated features aboved.. thanks 4 the same ideas we had..from philippines… STI COLLEGE uNIVERSITY
May 31st, 2010 at 5:26
Great I was looking for this, as I’m Leaving for hollidays, this will be a perfect project before getting off.
-In reply to the gravity lovers, I understood that with this solution the chicks will eat the grain all day, wrather than just around feeding time in the morning.
Thanks mate, good instructable…