
Build your own Robotic WebCam |
By Jawed |
Overview
Here’s how to build a webcam that can be viewed and controlled from the web:
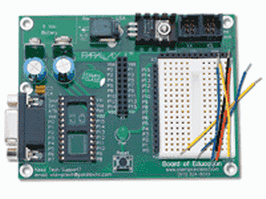 Parallax Basic Stamp 2 Starter Kit. This includes a board and a microcontroller with a BASIC interpreter. |
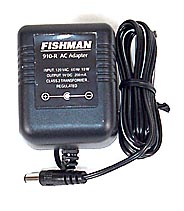 Notice the 9-Volt battery hook-up in the upper left corner of the board above. You’ll need a power supply like this one, but one that has the 9-Volt battery style connector. |
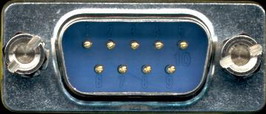
 Obtain a cable adapter that allows you to get easy access to the 9 individual pins of your serial port, like the one on the left. I could only find one for 25-pin ports, so I needed the 25-to-9 pin adapter on the right. |
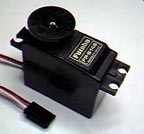 Futaba S-148 Servo. Your webcam will be mounted on top of the servo. |
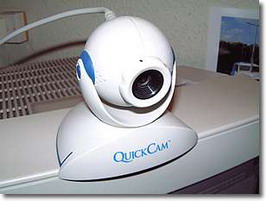 To stream live video directly from your computer, download the WebCam32 software. It allows you to show streaming video from a webpage by pointing the source URL directly at your own PC. You may have to open up the appropriate ports on your firewall. WebCam32 contains a Java applet which is automatically launched on the viewer’s browser. I recommend a Logitech WebCam. They’re around $100 or less. |
 Connect the serial port’s pin 2 (Received Data) to the Basic Stamp’s pin 10. The Parallax Basic program will be waiting on pin 10 for one of three signals: L (left), C (center), R (right). Connect serial pin 5 (Ground) to the Basic Stamp’s Vss (Ground). |
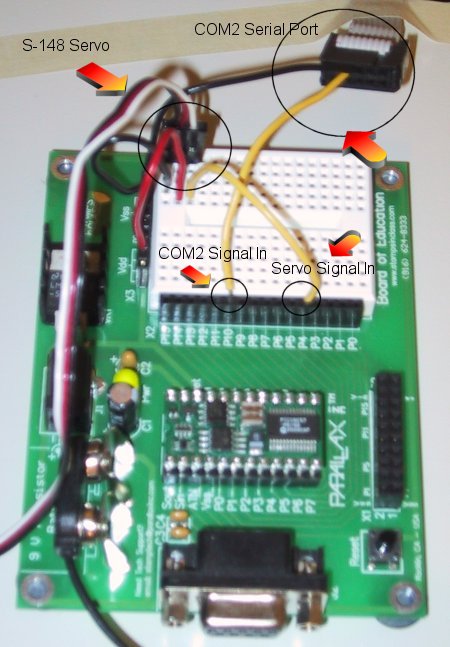 The servo motor has three cables: Ground (black), Positive 5 Volts (red), Signal (white). Its signal line should be connected to the Basic Stamp’s pin 4. The Parallax Basic program will be sending signals to the servo on this pin. The servo motor’s Ground cable should be connected to the Basic Stamp’s Vss (Ground). Its Positive 5 Volts line should be connected to the Basic Stamp’s Vdd (Positive 5 Volts). The Basic Stamps provides enough juice to power the servo by itself. (Click for larger picture) |
Software
Where: webserver
Purpose: opens a socket and sends command to listener running on PC
Language: PHP
if (isSet($dir))
{
	$fp = fsockopen ("YOUR.IP.ADDR", 443, &$errno, &$errstr, 30);
	if (!$fp)
		die ($errstr);

	fputs ($fp, $dir);
	fclose ($fp);
}
|
Where: PC
Purpose: listens for incoming commands from PHP script and executes VBS scripts
Language: C++
#include "stdafx.h"
#include "afxsock.h"

CWinApp theApp;
using namespace std;

void failure (char *err)
{
	AfxMessageBox (err);
	exit (-1);
}

int _tmain(int argc, TCHAR* argv[], TCHAR* envp[])
{
	// initialize MFC and print and error on failure
	if (!AfxWinInit(::GetModuleHandle(NULL), NULL, ::GetCommandLine(), 0))
		failure ("Unable to init MFC!");

	// initialize sockets
	if (!AfxSocketInit ())
		failure ("Unable to init Winsock!");

	CSocket in;
	if (!in.Create (443))
		failure ("Unable to init Socket!");

	in.Listen (5);

	while (1)
	{
		// blocks until connection received
		CSocket newconn;
		BOOL rc = in.Accept (newconn);
		if (!rc)
		{
			printf ("ACCEPT ERROR!\n");
			continue;
		}

		struct tm *newtime;
		time_t aclock;

		time( &aclock );                 /* Get time in seconds */
		newtime = localtime( &aclock );  /* Convert time to struct */

		// get one byte
		char buf;
		int num_received = newconn.Receive (&buf, 1);

		newconn.Close ();

		if (num_received)
		{
			cout << asctime( newtime );

			switch (buf)
			{
				case 'R':
					printf ("RIGHT!\n");
					system ("RIGHT.vbs");
					break;
				case 'L':
					printf ("LEFT!\n");
					system ("LEFT.vbs");
					break;
				case 'C':
					printf ("CENTER!\n");
					system ("CENTER.vbs");
					break;

				default:
					printf ("ERROR!\n");
					break;
			}
		}
	}

	in.Close ();

	return 0;
}
|
Where: PC
Purpose: send signal “L”, “C”, or “R” on COM2 serial port
Language: Visual Basic Script (.vbs) (Why VBS? Because I couldn’t figure out how to do it in Win32.)
' CENTER.vbs
Set com = CreateObject ("MSCommLib.MSComm")
com.CommPort = 2
com.Settings = "9600,N,8,1"
com.PortOpen = True
com.Output = "C"
com.PortOpen = False

' LEFT.vbs
Set com = CreateObject ("MSCommLib.MSComm")
com.CommPort = 2
com.Settings = "9600,N,8,1"
com.PortOpen = True
com.Output = "L"
com.PortOpen = False

' RIGHT.vbs
Set com = CreateObject ("MSCommLib.MSComm")
com.CommPort = 2
com.Settings = "9600,N,8,1"
com.PortOpen = True
com.Output = "R"
com.PortOpen = False
|
Where: Parallax Basic Stamp 2
Purpose: sends pulse signal to servo motor according to received signal from serial port
Language: Parallax Basic
counter var     byte
revolveWait     con     30
letter var byte

counter =       0

read_input:
        ' get some data on pin 10
        serin 10\0, 16468,[letter]

        if letter = "L" then start_left
        if letter = "R" then start_right
        if letter = "C" then start_center


'START LEFT ROTATION
start_left
        counter = 0

left:
        pulsout 4,1500
        pause 20

        counter = counter + 1

        if counter > revolveWait then read_input
        goto left

'START RIGHT ROTATION
start_right:
        counter = 0

right:
        pulsout 4,1
        pause 20

        counter = counter + 1

        if counter > revolveWait then read_input
        goto right

'CENTER SERVO
start_center:
        counter = 0

center:
        pulsout 4,600
        pause 20

        counter = counter + 1

        if counter > revolveWait then read_input
        goto center
|
You must be logged in to post a comment.
Help us continue our work with a donation
 Forum {beta} Forum {beta}Hatch ideas and help others with their ideas. |


18 queries. 0.083 seconds
April 26th, 2007 at 9:58
hi,
i want to know how i can make the c++ program and the vb program executable
April 15th, 2008 at 13:47
hi all , plz i want the c++ code for the webcam becouse i want to use it in a robotic project , so if you can help me with this , plz send the code to my E-mail: ( the_bad_killer@hotmail.com )
hope to c your rely
thx
zaid ghanem
September 15th, 2008 at 12:26
have you got any ideas in how to put a camera in laptop so its built in, if so where do you get the camera form. i want my laptop to have builtmin camera and i want to build it in myself. i wnat it to be built in like appple mac/laptop camera
September 15th, 2008 at 12:26
have you got any ideas in how to put a camera in laptop so its built in, if so where do you get the camera form. i want my laptop to have builtmin camera and i want to build it in myself. i wnat it to be built in like appple mac/laptop camera
September 15th, 2008 at 12:26
have you got any ideas in how to put a camera in laptop so its built in, if so where do you get the camera form. i want my laptop to have builtmin camera and i want to build it in myself. i wnat it to be built in like appple mac/laptop camera