
How-to build a snow candle |
By Chris J├ā┬żrn├ā┬źker |
 When I grew up in Sweden a common thing to do with the children (that would be me back then) was to build snow lights. As you have a lot of snow, it gets dark at 3pm and you want the children to play outside you would hand them a bunch of candles and send them out to build snow lights all around the house. Later on you would light them up and stand in the kitchen window to look at them. Well, back then, being a child and everything, it was the coolest thing to see as a well build one can burn all through the night and still be lit in the morning. Now I have kids on my own and of course this was something I just had to do with them. But – no one here (I moved to the Netherlands a couple of years ago) ever heard of these and they were all amazed of my innovative little product when I lit it in the evening. So if people here haven’t heard of them then surly there are more people in the world missing out on some winter time fun with the children. You can do this as long as the snow can be compressed into snow balls, so between +1 c / 33 f down to -7 c / 19 f or so. |
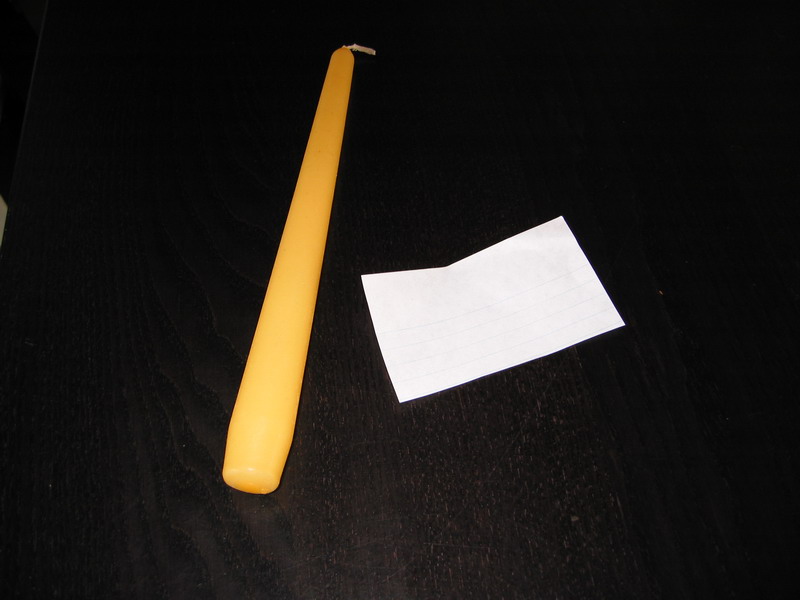
 To avoid some frustration later on we will take a piece of paper and shape it into a cone. This will be placed on the candle while we’re building it as we don’t want the wick to get wet by snow. You could skip this and if it gets wet by snow then you just have to use a couple of matches extra before it gets lit. |
 Cut off the candle so that it has a proper length. In my case I just had to cut it in half. Then place the candle in some snow and press some extra snow around it so that it stays stable. |
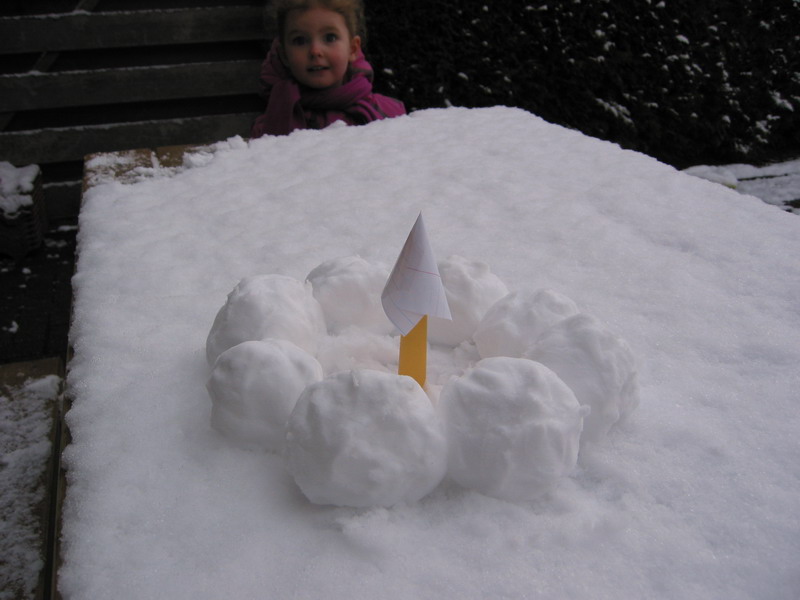 Make snow balls! Press them together firmly but not too hard. They have to be able to slide into each other later on so one or to firm presses is usually enough. A good size of a snow ball is about 5 cm / 2 inches. Place about eight of them in a circle with about 5 cm / 2 inches space to the candle. Smaller ring and the snow balls with melt and larger and it will easily fall apart. |
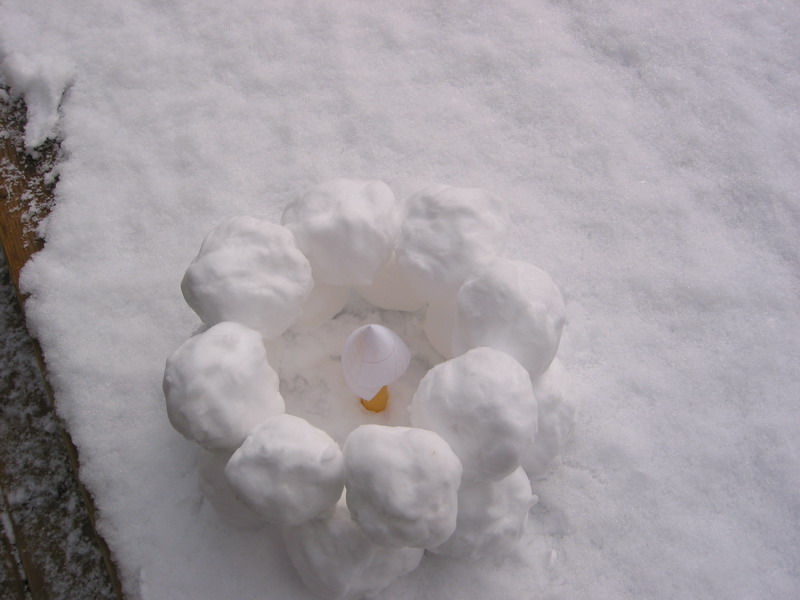 Build another ring of snow balls on top of the first one. Carefully try to push the ring together but don’t use more then a little force. Press to hard and all of it will collapse. We don’t want that. |
 Now make the third ring with less balls, like 5-6 so that it gets smaller. As they will tilt inwards you will need to make them balance on each other without falling down into the centre. It takes some practice but it isn’t that hard. Then place a last three snow balls on top to close it off. |
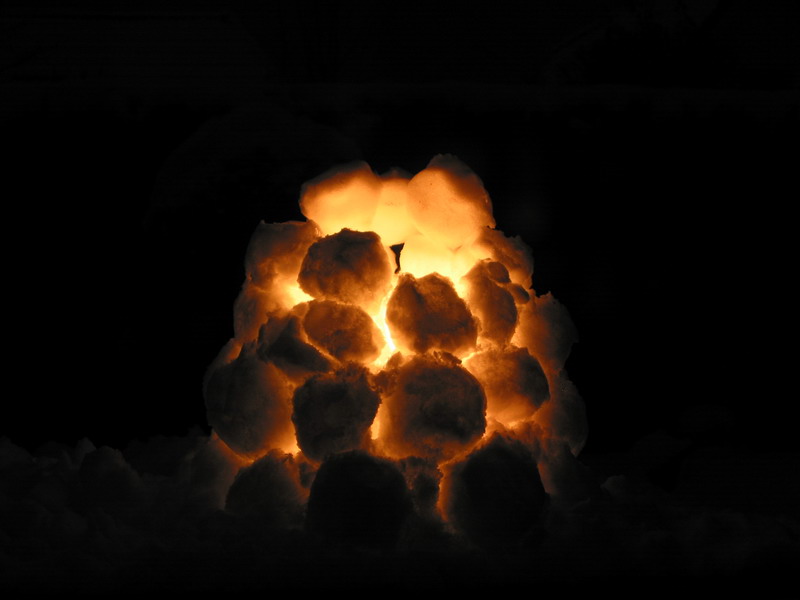 Wait until it gets dark and lit ’em up! You would think that the heat from the candle would make the whole construction to collapse but that doesn’t happen. What does happen though is that the top balls melt on the inside but as it’s (hopefully) freezing the cold keeps the majority of the snow ball frozen. To light one of these I usually use a candle lighter, you know one of those with a long tube. Just stick it in through a gap between the balls and flip the protective paper off then you can light it. |
 If there’s a lot of wind then you can carefully take some snow and close off the gaps between the snow balls. It will loose some if its effect but the candle will stay lit. If you build one – send me a picture. I’d love to see how creative you are! |
You must be logged in to post a comment.
Help us continue our work with a donation
 Forum {beta} Forum {beta}Hatch ideas and help others with their ideas. |


17 queries. 0.073 seconds
March 1st, 2006 at 6:35
Absolutly excellant!!!!
I just wish we had snow in the south of England, but if we do get enough, I will give it a go.
March 1st, 2006 at 20:39
Wow. I just wished we had snow in Malaysia and ice cubes are not the same.
March 2nd, 2006 at 4:21
Beautifull!
March 2nd, 2006 at 11:34
Great idea – beautiful !
A friend of mine does a similar thing by “partially” freezing water in a 5 gallon bucket to create an “ice globe”.
Then she puts the candle inside the ice globe.
Can’t wait to try yours when we get more snow
March 3rd, 2006 at 8:55
Super !
Today will be create. (Moscow, Russia – There is enough snow)
March 9th, 2006 at 15:40
As soon as it snows in Orlando, FL I’ll be all over this one!
March 22nd, 2006 at 15:10
Here’s a picture sent in from Marcel –Snowlight–
April 24th, 2006 at 11:24
I wish I had seen this before the snow in Denver was gone for the season.
October 10th, 2007 at 15:59
Nice
October 14th, 2007 at 17:39
Brilliant!
December 12th, 2007 at 21:31
I fill balloons with colored water using food coloring. First squeeze as much food color into the balloon as you wish. Next (the fun part!!) is fitting the neck of the balloon onto the kitchen tap, filling it just right and then tying the neck of the balloon before any water escapes. Keep dry towels handy!!
I then get get all my mixing bowls and set these water filled balloons in them to cart them outdoors to freeze.
Make sure you don’t bury them in snow, there is too much thermal ‘warmth’ to snow covering. We set ours in shade as the ice will not form in the sun. Wait a few days unless it’s minus 40c as it can be in Central Saskatchewan.
Some ice balls will split the balloon , some will have to be peeled. We set our colored ice balls within some greens such as cedar, the colored ice balls are beautiful as a Christmas decoration.
Interestingly enough some freeze with color spiraling inwards. Some don’t freeze in the very center. There would be great for placing a candle. If you have a big enough flower pot fill that with snow then top it off with the greenery and ice balls. As it snows more you will have to sweep snow off however we enjoy ours until it melts in spring. Oh, this will work in the deep freeze, somehow it’s more fun outdoors! Cheers & Happy Holidays
Sandy Klass’n (sure do have fun with my name this time of year!! )
December 19th, 2007 at 20:52
This is great…we have tons of snow, and I’ll build a snow light for Christmas. Ottawa, Canada.
March 24th, 2008 at 22:00
Today four of my grandchildredn and myself made five of these snow candles. After it got dark we went out to light them….all five have been glowing for over and hour….this is beautiful and will be a tradition for years to come. I just stumbled onto this website and what a blessing it has been. THANK YOU marybeth
January 31st, 2009 at 9:34
I just got hooked up to the internet yesterday so give me some time to take some pics and upload them to my pc then I can send some in…………your not going to believe your eyes. my “snow candles” look like water falls or trees. I’ve even moved beyond this style to making deserted islands complete with a palm tree, so hold your pants on and give me some time your going to love my “snow candles”