
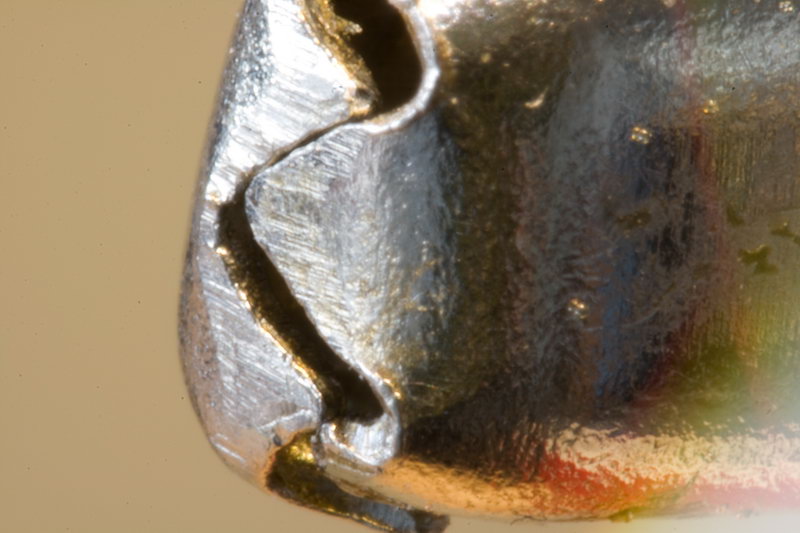
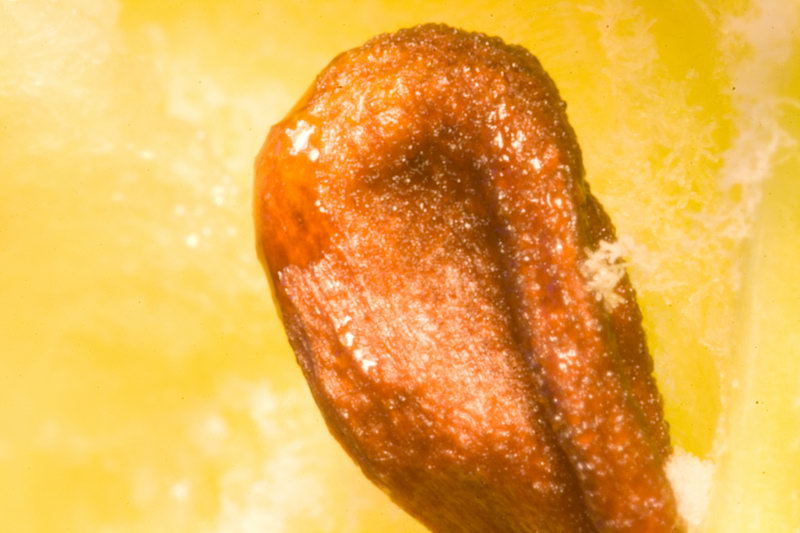
 Photography is fun. And expensive. Especially when you realize the difference between the different lenses and that there are no shortcuts.If money wasn't an issue then I would probably have something like 7-8 different lenses right now just to have the right lens for that particular moment. But as many of the lenses start at $1200 it doesn't become reality that fast. One thing that I've always enjoyed is to see things really closeup. Not microscope closeup but you know, just so that you can explore the grooves on your finger. It puts what you can see with the naked eye in a whole new perspective. To get a decent macro lens you get close to another $800, which is not what I'd like to pay out just to have fun a couple of hours here and there. The picture to the left; alligator clip closeup with the final lens, Canon EFS 18-55 DIY Macro 18mm f/22 30s |
 Enter DIY. A very well unknown but not new idea about macro photography is to use an SLR camera which accepts you to remove the lens and still operate and then turn the lens back to front. Of course you can't mount it back to front so you'd need to hold it in front of the camera. Then set the lens to the shortest focal lenght and infinite zoom, then place an object about an inch or two (25-50mm) away from the front (back) glass and voila! You just used you standard lens to achieve macro. Normally you can use an 18mm lens (or zoom set to 18mm) and on a APC size sensor (not full frame) this usually means that an object that is .2 inches (5mm) will fill the whole picture. That is about 4.5x magnification! Holding a lens if front of the camera creates two problems in itself. To start with it's of course difficult to hold the assembly still and you need to keep it still. And you need to keep it still as the available light creates a need for long exposure times. |

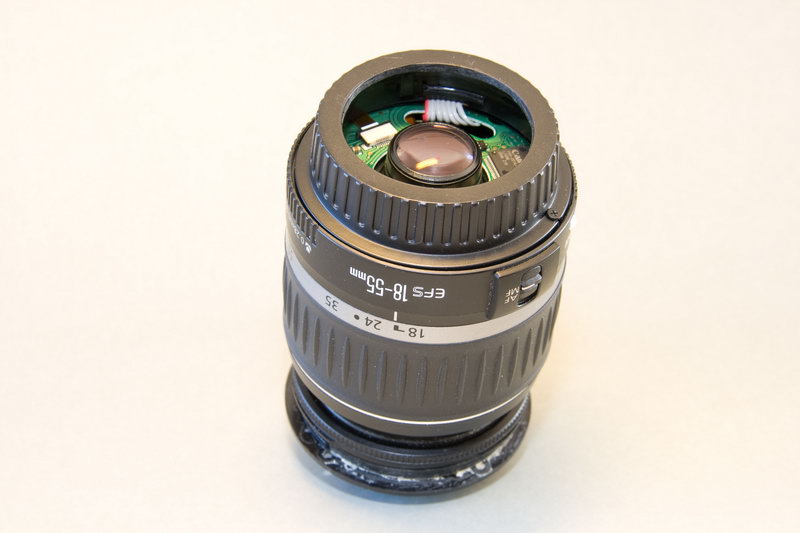
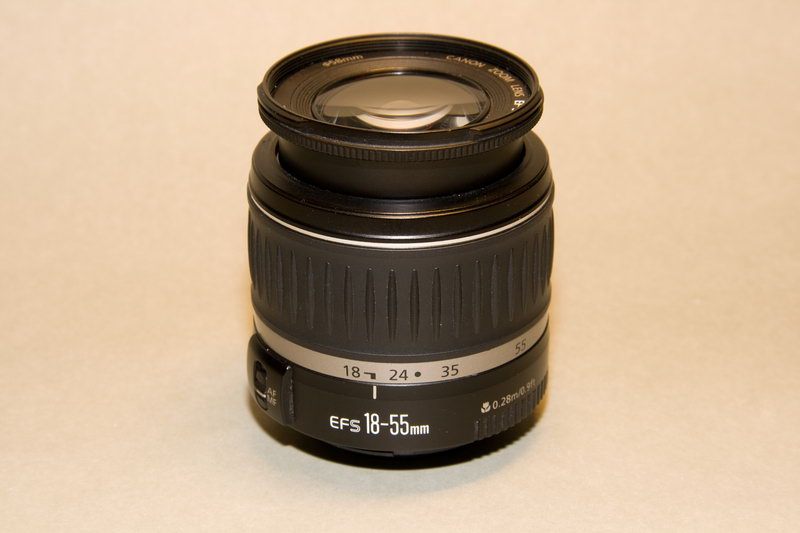
I managed to pick up this Canon EF-S 18-55 standard lens a couple of days ago for $10 as the AF (auto focus) didn't work. Considering that the investment was negileble and that the weekend was coming up I decided to rebuild this one into a permanent reverse mount macro lens and to try to include the electric contacts as well. That way I could do the longer exposures with smaller apertures (higher f value) which was what I wanted to achieve. The reason why the AF didn't work was that someone had probably dropped the lens hard against something and that the front glass was pushed in slightly. There were no damages on the glass and the fact that the glass was not perfectly level wouldn't really matter to me. But, what exactly happened with the relocation of the glass was that it created tension in the cylinder that holds the glass and hence was it not perfectly round, which meant that it didn't slide smoothly and needed a teeny weeny amount of extra force to turn, which meant that it was to tought for the AF motor to turn around.
|
|
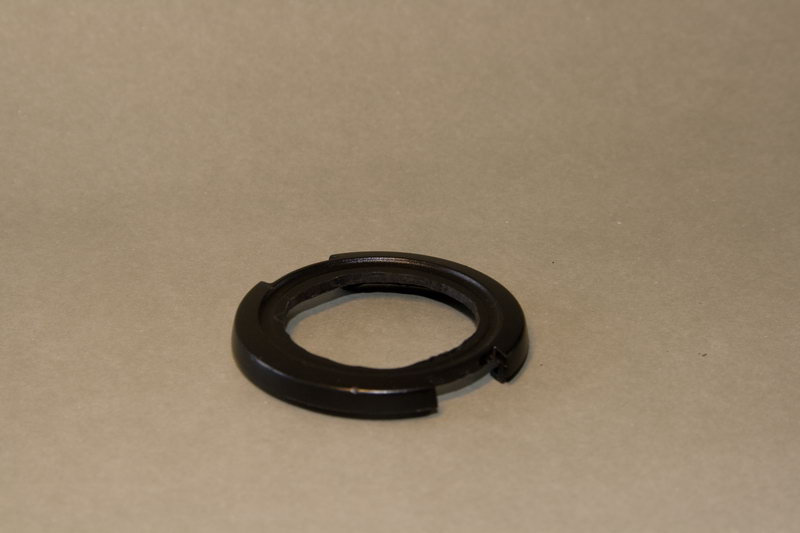
The whole idea was to take the back mount of the lens and mount it on the front somehow.
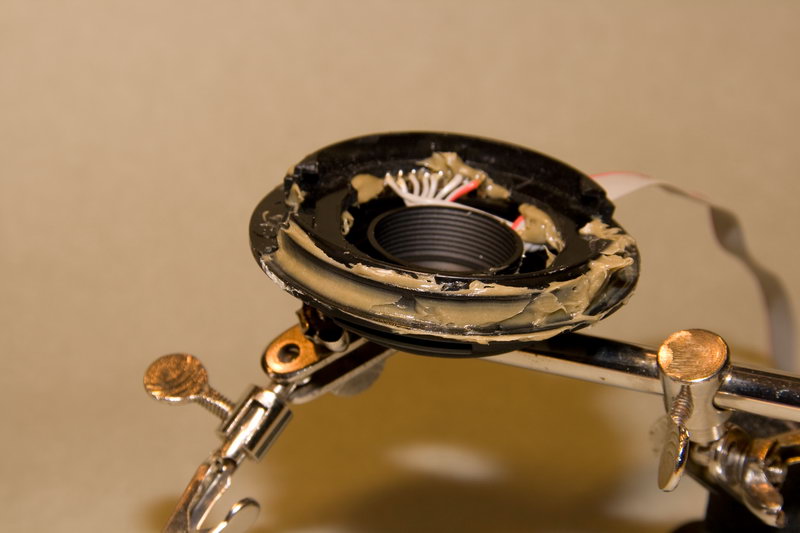
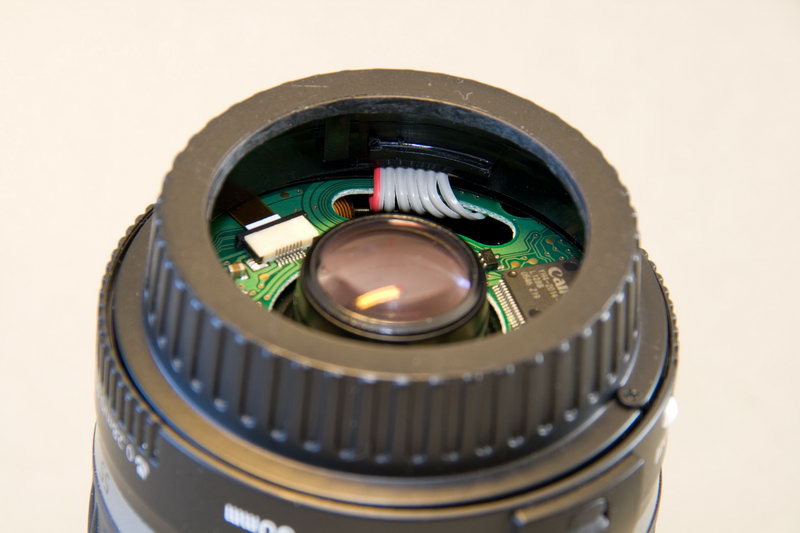
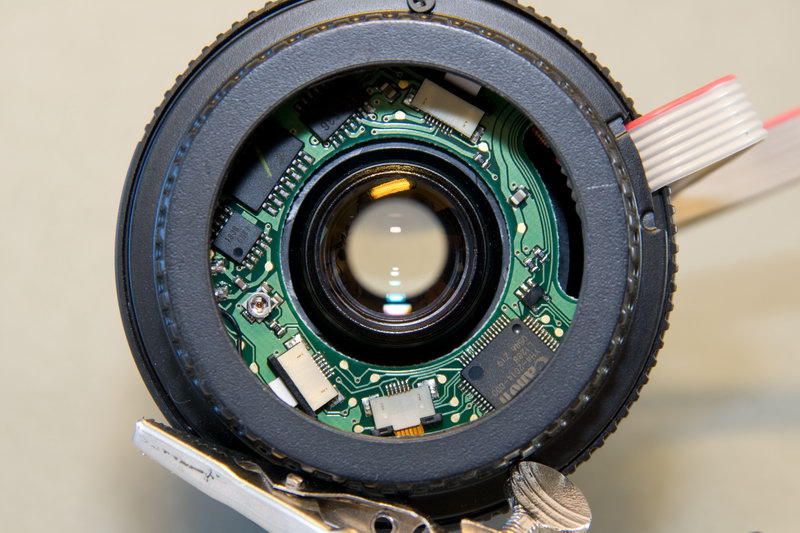
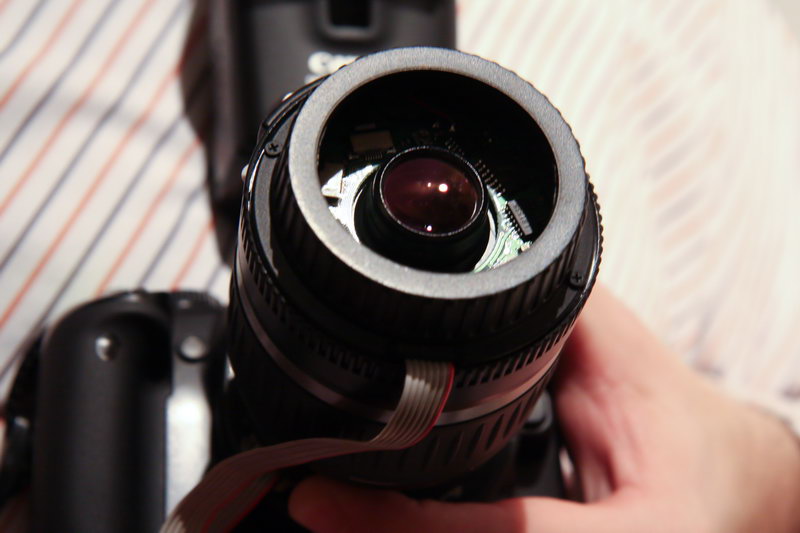
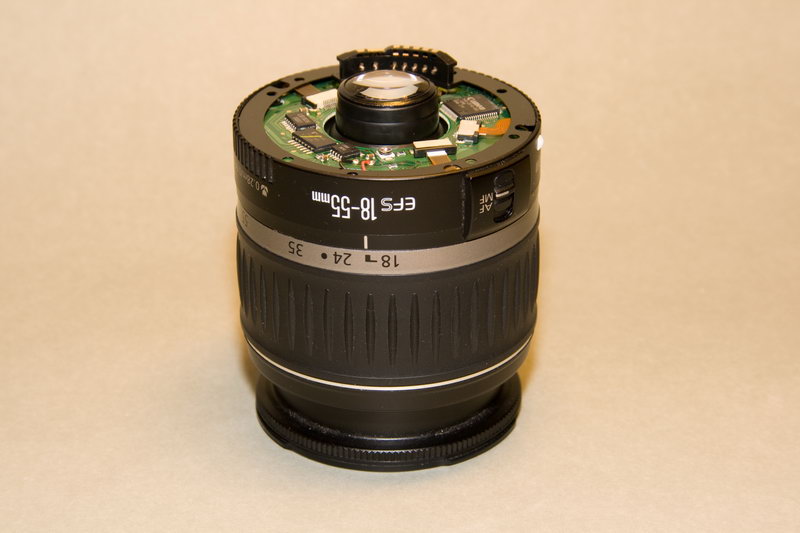 The back of the lens (that fits into the camera) not only has the perfect fit with the camera house but it also holds the electrical connection for the lens. On the Canon EFS 18-55 the mount is in plastic as this is like the entry standard lens for small dSLR's. Well, if they're going to produce a cheap lens then I guess I'd rather have them save money on steel vs plastic then to cut back on the costs of the glass. The mount is fitted with four screws on the outer rim of the lens and was easy enough to get off. What puzzeled me was how the connector was attached to the mount and after some time I found two small screws visible from the side of the mount by the connector that held it. You can see the connector behind the glass on the picture.
|
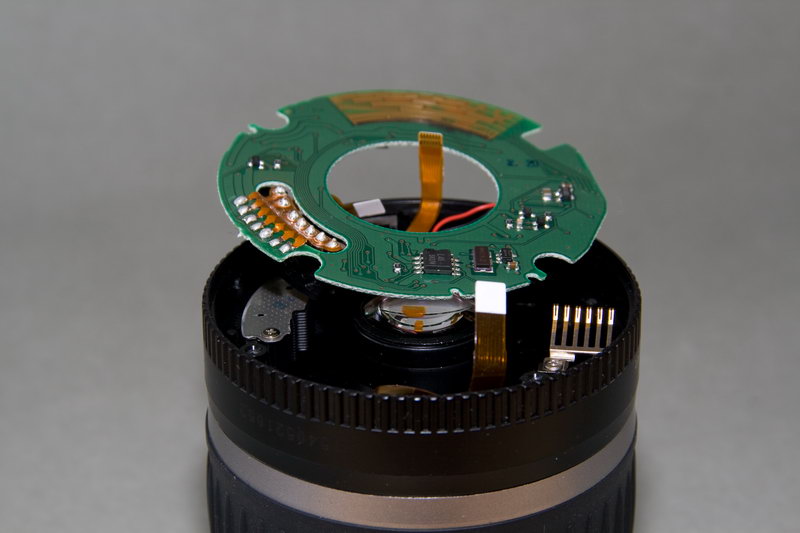
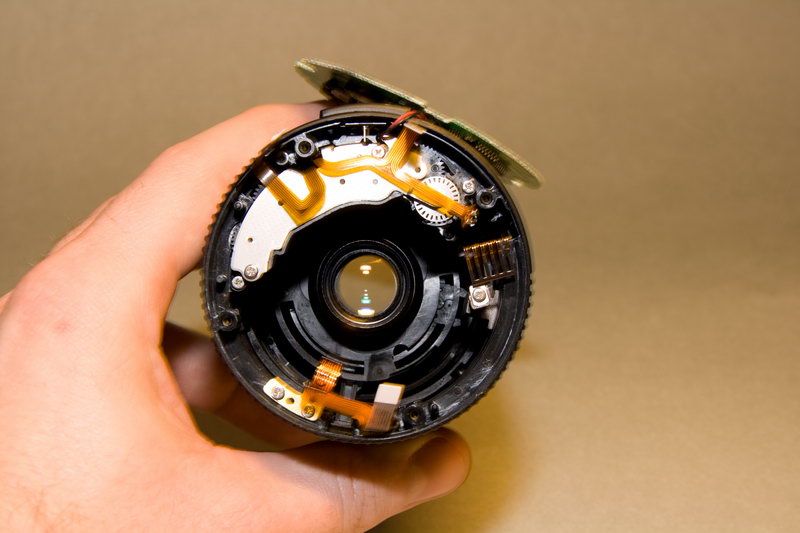 So the process looks something like this: get back mount off, get connector off, connect long cable between connector and pcb, mount connector in back mount, mount back mount on front. As I had to get into the lens anyway to get the connector soldered off I decided to see if I could fix that front glass problem while I was at it. Unfortunatley a temporary glitch in my brain made me forget to take the pictures of the inside.. Bummer. But basically what I did was to remove the rubber ring on the outside to expose the outer screws and remove them, remove pcb, remove all the motor and gear assembly without taking the gear apart, remove the small metal sensor moving thingy and the steel rod guiding thing. And then I had a lens in pieces in front of me ¤śē When the front glass was finally exposed I took… the largest screwdriver I could find in my toolbox and put that next on the plastic next to the glass and hit it. Click, and that was that. The glass slid back into position very nicely. A note is on its place here. Lenses are very delicate and your mistakes with the lens will show on the final pictures. Your biggest enemy is and will always be dust. It's virtually impossible to open a lens and then close it without leaving dust behind. And some of that dust will most probably not be visible to the naked eye but only show up when you put all of it back together. If you need to open a lens then you should either have a clean-room, not just a clean room, and all the necessary dust protection equipment necessary – or leave it to the pro's. Now, if you happen to have a lens like this and want to do it yourself you shouldn't face any issues as long as you don't decide to see what's inside. Just to remove the back mount and place it on the front might be stupid, but you won't ruin your lens at least ;). |
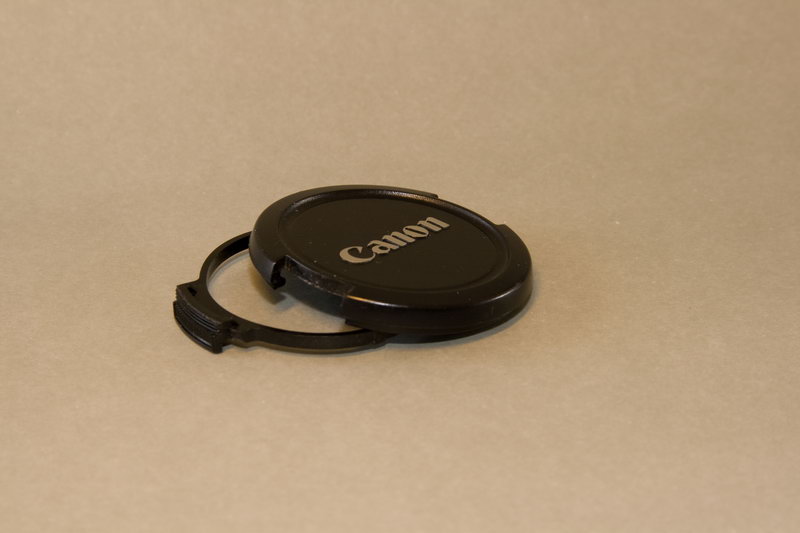
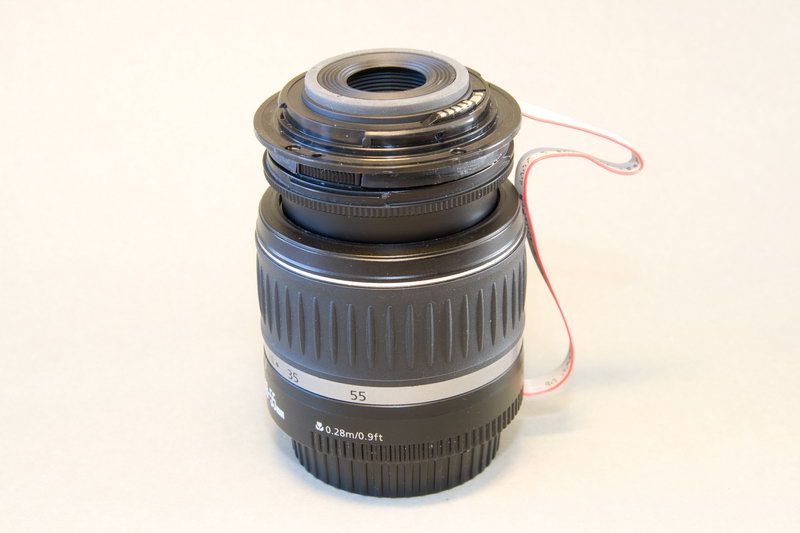
 What I wanted to achieve was to have a lens that could actually be mounted and removed on my camera using the standard fitting and at the same time be practical. Initially I was thinking of just glueing or screwing the back onto the front of the lens. But then I realized that in time the lens would most probably need cleaning and to unscrew / crack the fitting just to do a quick clean of the front glass (now back) would not really be a practical solution. So I came up with the brilliant (at least I think so) idea of taking the original lens cap, which can easily be fitted and removed from the front to the lens, drill a hole in it and glue that piece to the mount that goes into the camera. So I dremelled (I just love that word!) out a hole a went off gluing.
As the contact for the lens will be inside this little thingy I also had to take out a little space between the lens cap and the mount for the cable to the back to be able to fit through |
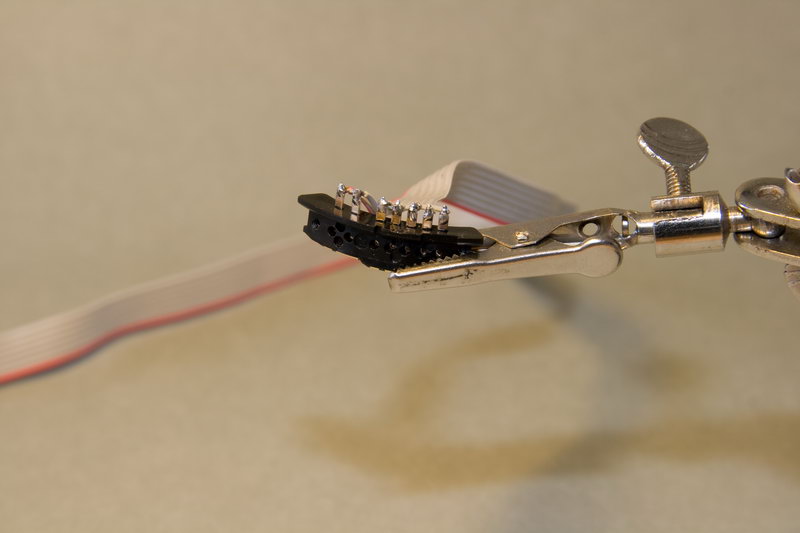
 The cable connecting the connector with the pcb is one of these flaky kind of pcb cables that always gets ruined when desoldering. Not that I needed it or so but… of course it got ruined after removing.. If I would have had a broked EOS around and an extra lens to slaughter then I would have made an removable front piece as well. Now, that I did not have. Basically, what I mean is that I could then have the new back piece (which is removable) and a new front piece (which would fit on the existing mount), so that I could fit this onto any lens. Anyway, what I'm getting at is the lenght of the cable between the back and front. As I want to have this flexibility in the future I checked how long cable I needed and added another 2 inches (5 cm) to that for good measure. The cable itself is from a regular IDE cable. A good tip here is to use one of the edges that is marked (like red) so that you know what side is which when you mount it.
|
 So. What I had in mind to get the lens cap and mount to stick together was some regular epoxy glue. See-through, solid in 10 minutes, done in 60. But Murphy made sure that I couldn't find those tubes and I had to resort to some ugly two component contact glue. Hey – how bad can it be? I should have read on the package before I started. "Hardens within 8 hours". And they didn't print on the package that it looks like s**t!. Well, you learn from your mistakes. At least it turned very hard and I managed to get most of that stuff off on the outside after it hardened.
|
 Not to much to say about the next step except for making sure you actually mount the cable the right way ¤śē I doubt that Canon are willing to serve your brand new EOS if you tell them that "Oh, I was disassembeling an EFS 18-55 and soldering a cable into it and -oups- put it the wrong way. But hey – the sparks were really cool!" |
 To finish this off I found that the back cap that you usually put on the back of your lens when not in use actually still had a good fit on the front (the old back). So no delay there but I dremelled out a hole, a small space for the cable, two slits for screws (as there are screw holes on the back (new front)) and put it together. It actually doesn't fill a real function except for making the DIY look a little bit more… done.
|
|
|
|
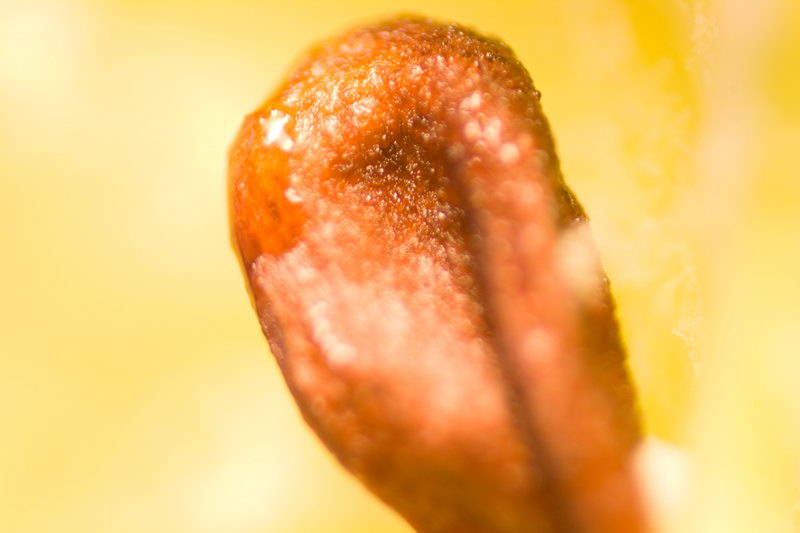
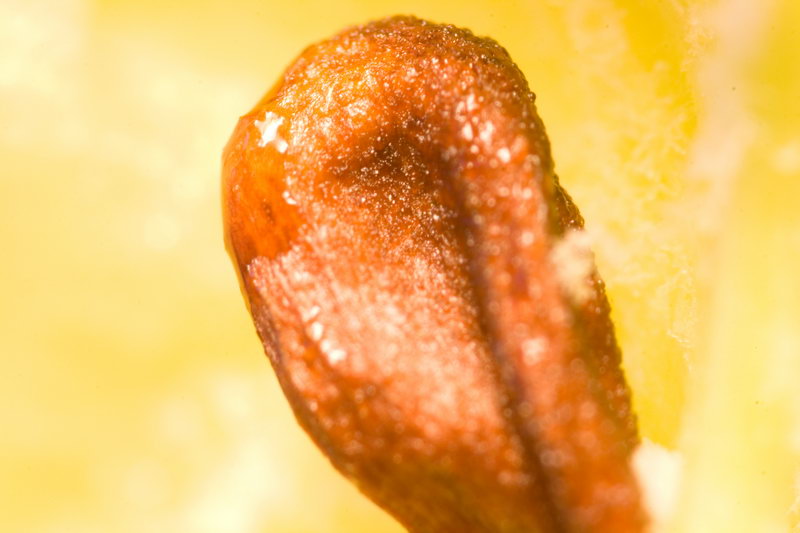
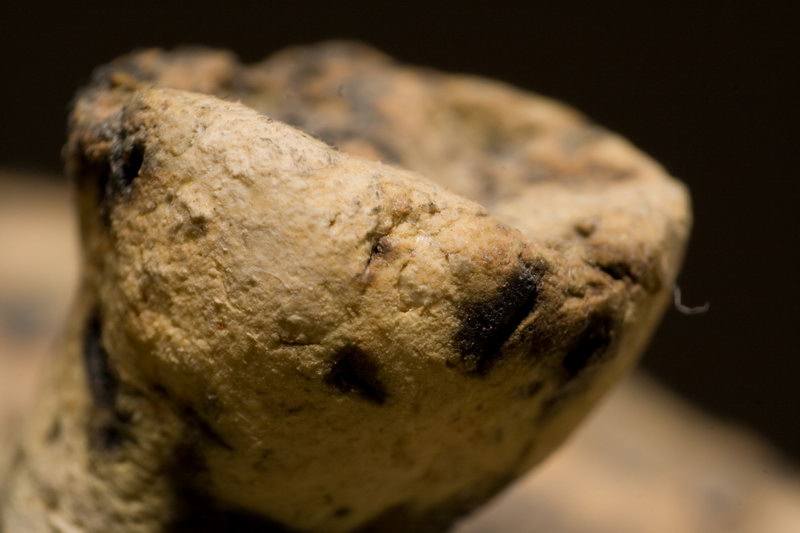
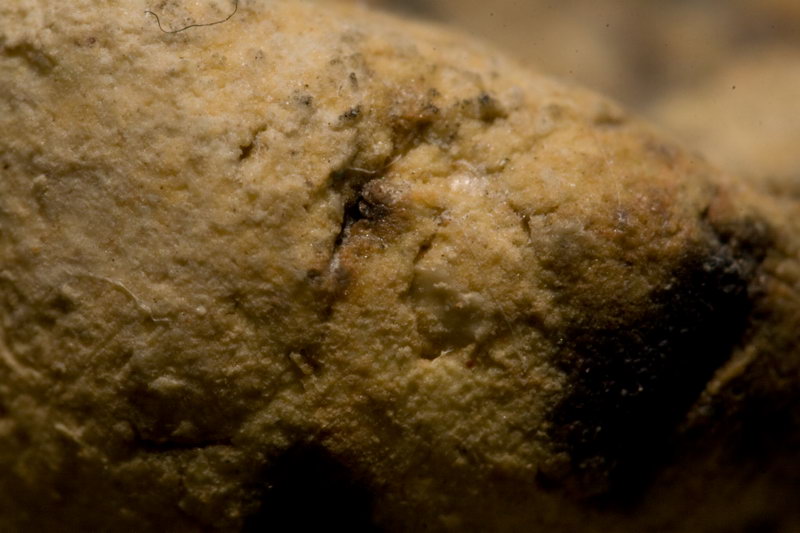
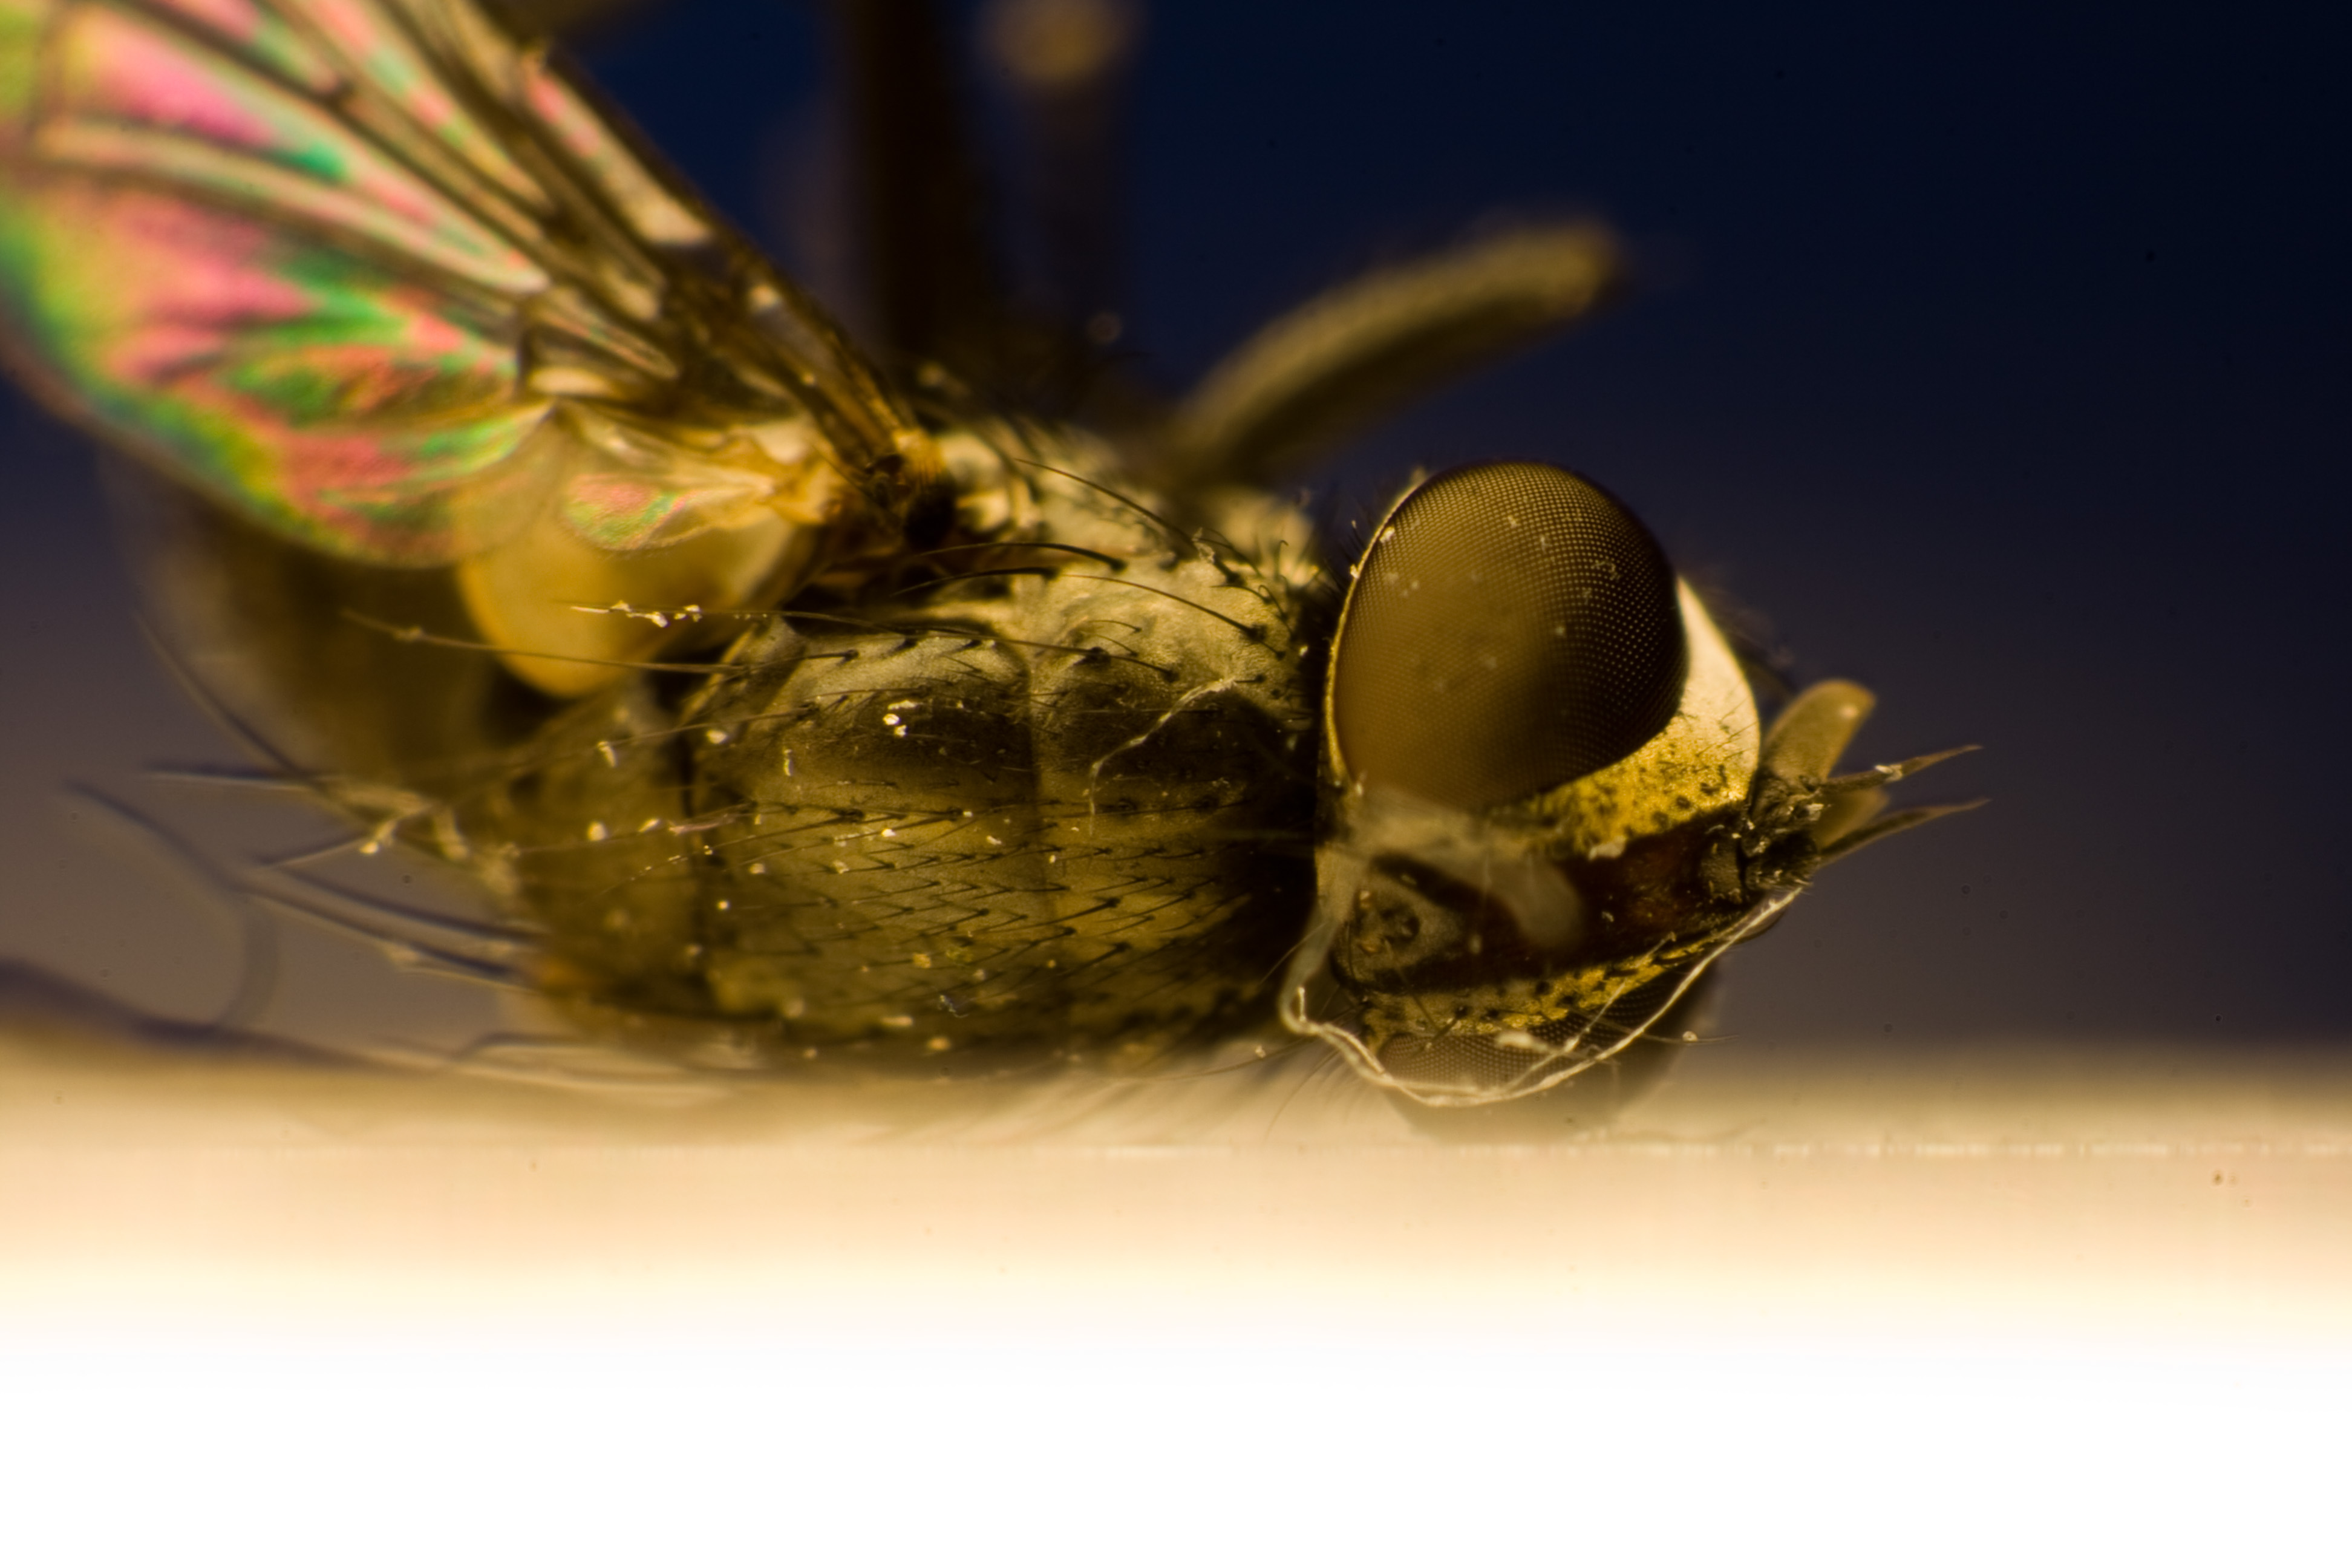
Some sample pictures
|
Difference in focal length
Here follows photographs which show what the different focal lenghts (mm value) result in. The two first pictures is shot with a normal lens at the closest focal distance. Secondly comes the DIY macro.
 Sigma 18-200 18mm f/10 13 inches away |
 Sigma 18-200 200mm f/10 13 inches away (max zoom) |
 Canon EFS 18-55 DIY Macro 55mm f/22 |
 Canon EFS 18-55 DIY Macro 35mm f/22 |
 Canon EFS 18-55 DIY Macro 18mm f/22 |
 Canon EFS 18-55 DIY Macro 18mm f/10 |
Difference in aperture 1
The following illustrations show the difference in aperture (f value) from f/3.5 – f/22.
 Canon EFS 18-55 DIY Macro 18mm f/3.5 |
 Canon EFS 18-55 DIY Macro 18mm f/8.0 |
 Canon EFS 18-55 DIY Macro 18mm f/14 |
Canon EFS 18-55 DIY Macro 18mm f/22 |
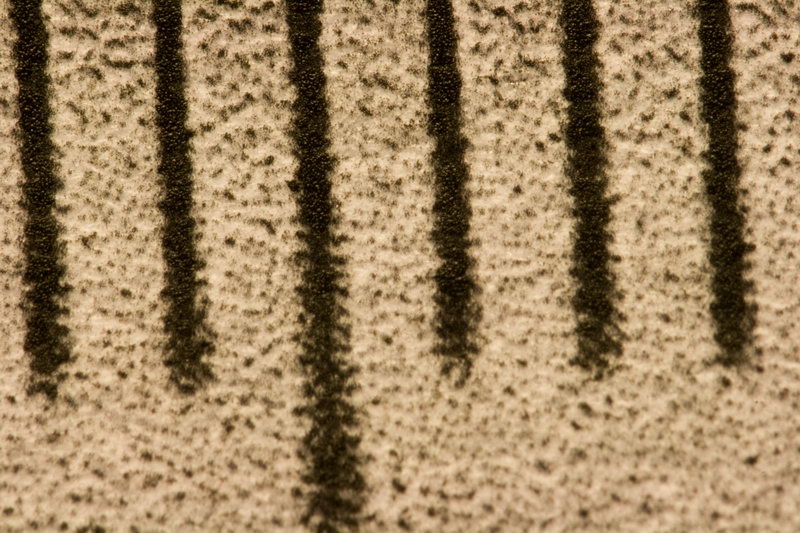
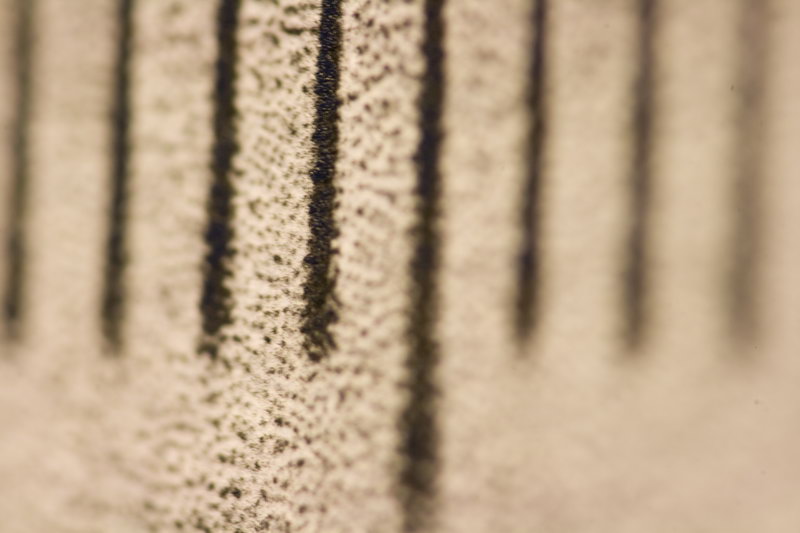
Difference in aperture 2
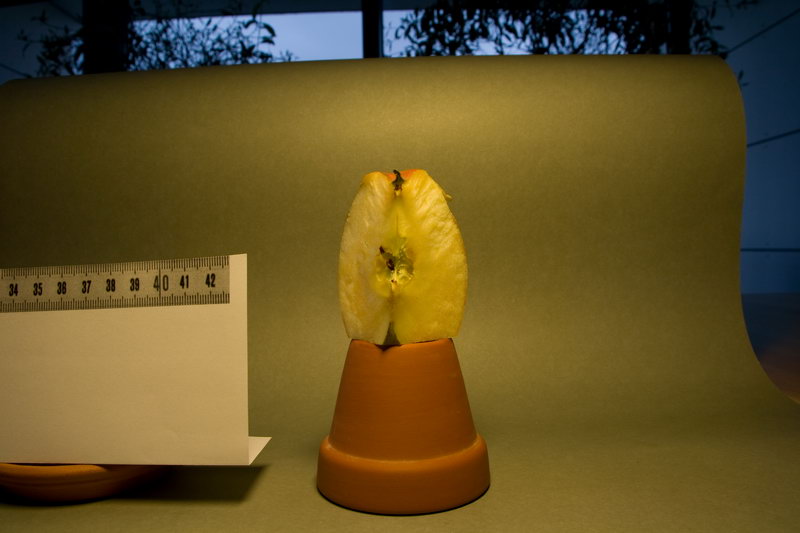
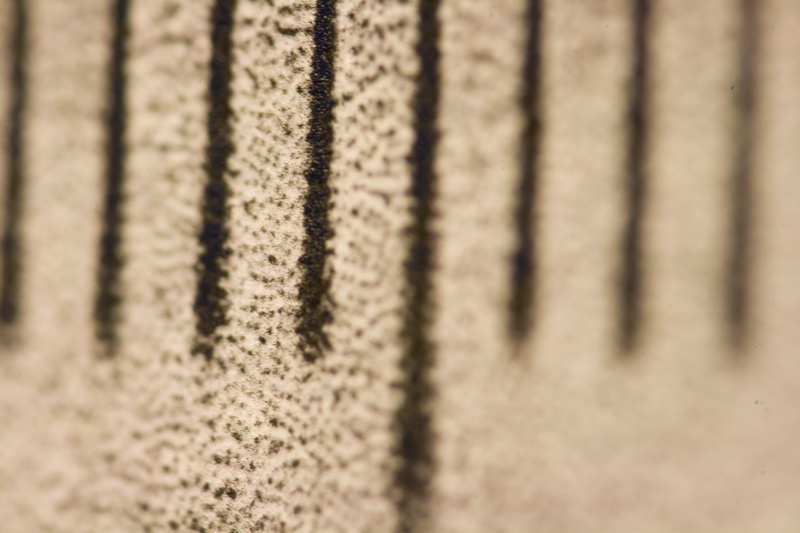
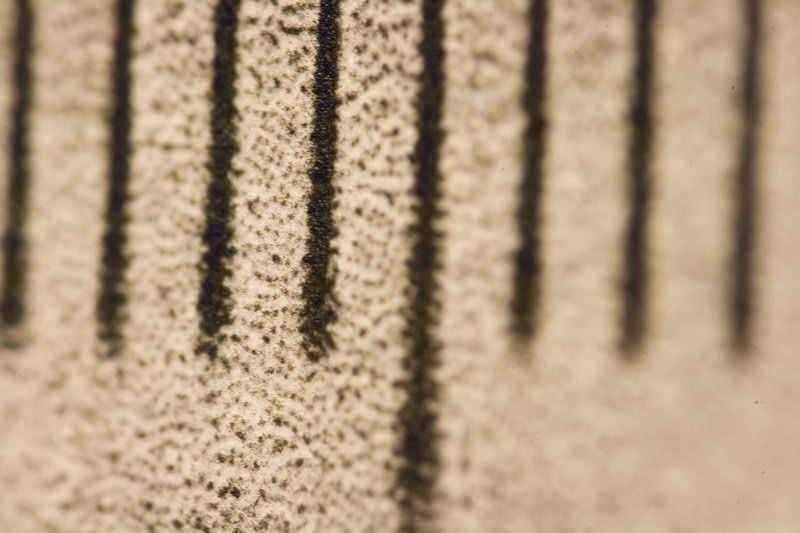
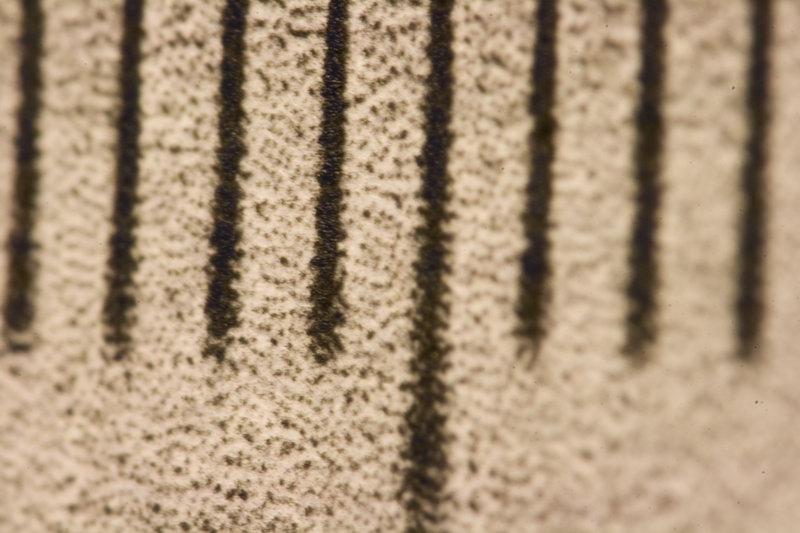
This one takes some explaining. What has been rigged here is a photocopy of a ruler in millimeters. So each line is 1 mm, which is 0.0393700787 inch. The whole screen fits 7 mm which is 0.275590551 inch.
The piece of paper is rigged in such a way that it's turned 45 degrees clockwise. That is; the left side is further away and the right side is closer.
 Canon EFS 18-55 DIY Macro 18mm f/3.5 |
 Canon EFS 18-55 DIY Macro 18mm f/4.5 |
 Canon EFS 18-55 DIY Macro 18mm f/5.6 |
 Canon EFS 18-55 DIY Macro 18mm f/7.1 |
 Canon EFS 18-55 DIY Macro 18mm f/9.0 |
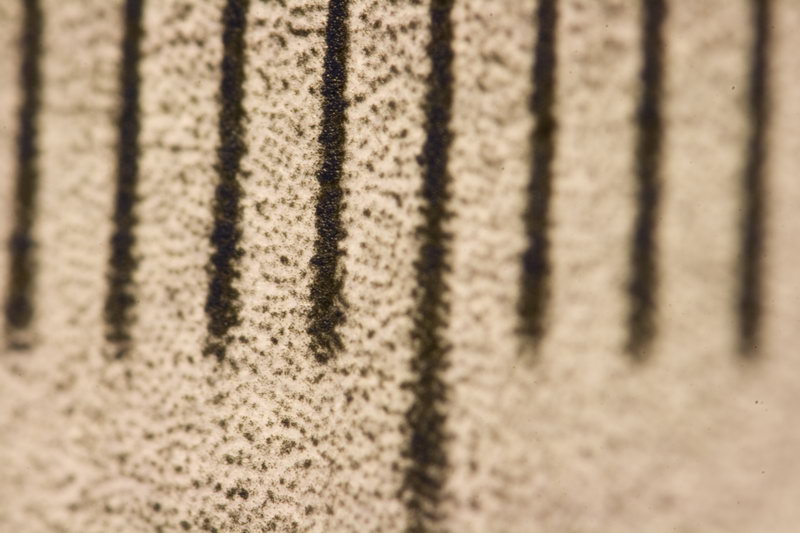 Canon EFS 18-55 DIY Macro 18mm f/11 |
 Canon EFS 18-55 DIY Macro 18mm f/14 |
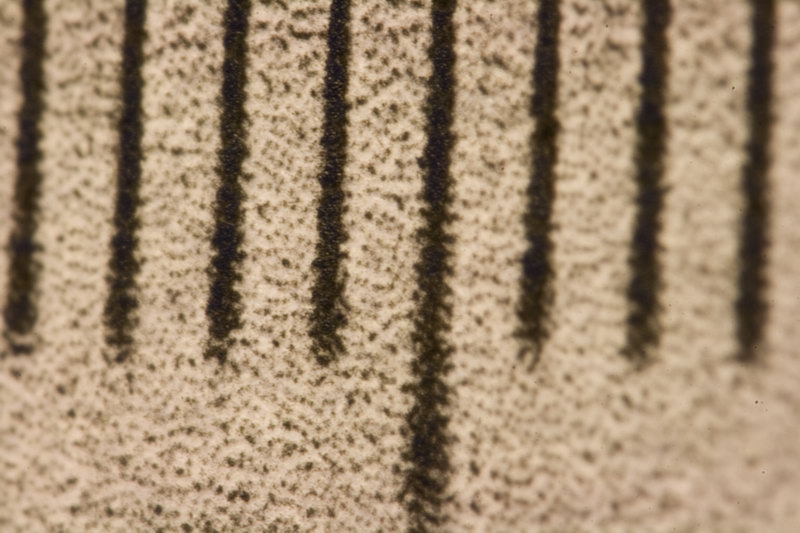 Canon EFS 18-55 DIY Macro 18mm f/18 |
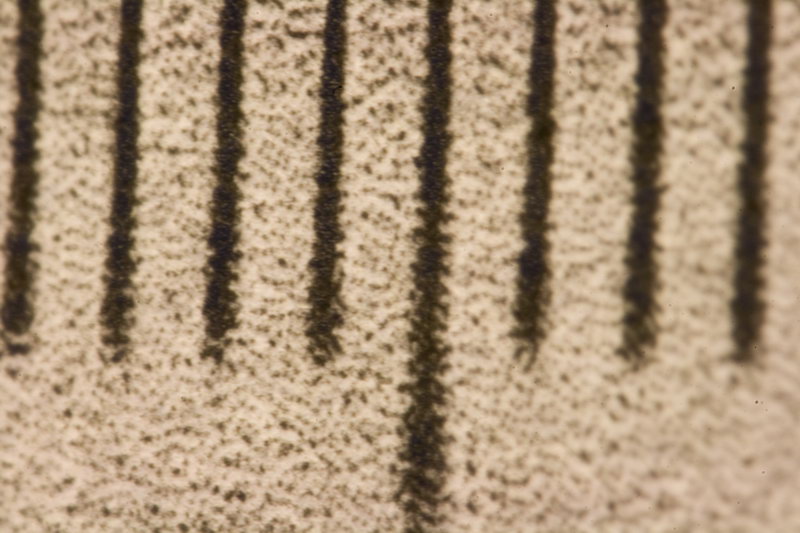 Canon EFS 18-55 DIY Macro 18mm f/22 |
You must be logged in to post a comment.
Help us continue our work with a donation
 Forum {beta} Forum {beta}Hatch ideas and help others with their ideas. |


20 queries. 0.142 seconds


February 22nd, 2009 at 0:39
Nice guide, but those initial calculations (which you said I shouldn’t hold you to) aren’t quite right. By the same logic, anything I look at that’s really far away should be really bright, because a huge object can fill the same portion of my field of vision as a small object.
Of course, this doesn’t happen, because seeing as you’re further away, your eye ends up getting a lot less light (due to the inverse square law).
Mind you, the overall effect of your calculations is (presumably) true – I’d imagine that turning a camera’s lens around would indeed result in longer exposure times, but probably not as drastically as your calculations show.
Either way, there’s still a huge problem in having to hold a lens still in front of a camera, so your guide was absolutely great
February 22nd, 2009 at 5:13
OR you can do like I did, and just search for “Canon reversing ring” on ebay, and buy a $9 ring that you screw onto the 58mm threads on the front of the lens, and than the front of the lens has standard a standard canon ring.. ¤śø
February 22nd, 2009 at 8:58
Aleksander: Yes you could – but without the electrical connection you can’t change the aperture, so you’ll be stuck on like f/3.5 which isn’t very useful. The main challenge I had for this project was to be able to change the aperture as I pleased when the lens was mounted in reverse.
Well you could also do this little trick to change the aperture (which could break your camera/lens):
Mount the normal lens as normally done.
Change the aperture to like f/11 and press the DOF preview button, then take out the battery of the camera.
Take the lens off and mount it reverse (with the aperture now stuck f/11 position)
February 22nd, 2009 at 14:13
completely speculating here…but if you got a reversing ring, couldn’t you add contacts to it and run a cable to the contacts which are now at the front? haven’t tried to look at all at feasibility, but it could be an easier/more flexible way to reverse lenses while maintaining aperture control.
February 22nd, 2009 at 14:23
eyrieowl: The problem in that would be that you don’t have the necessary connectors on the camera piece (the ring) and you still need to connect the wires to the lens (on the front)
February 22nd, 2009 at 17:14
i don’t think you’re understanding what i’m suggesting: step 1) take reversing ring: it does not have connectors on the ring. granted. so, step 2) drill and modify it to add connectors. now, step 3) take a rear-lens cap. step 4) dremel out the center and step 5) put appropriate connectors on it as well. step 6) run cable from connectors on reversing ring to connectors on rear cap. step 7) put lens in between the ring and cap and step 8) mount on camera. I find it hard to imagine that this couldn’t be done and made to work. of course, i freely admit i’m being an armchair hacker here, and there may be some insurmountable difficulty. but it *seems* like you could get full control of the lens without modifying the lens at all.
February 22nd, 2009 at 20:46
Or you buy a nikon body and every lens made in the last 50 years will work on it. The 55mm Vivitar Macro lens is great and can be had on ebay for 20USD add the matching 2x teleconverter to it and you have a 110mm macro and ad in the 1.56 crop factor and you get a 160mm macro that will focus at the end of the lens for oh say 50. And the cool part is the focus and the aperture work like they are suppose to.
February 23rd, 2009 at 0:38
eyrieowl: Of course that should work. It’s just the trouble in getting the actual connectors onto the lens cap and the ring that will stop you. I mean, how do you actually go about to facilitate this?
That’s why you’ll probably be easier off by cannibalizing an existing lens to get to the connectors with the right fittings.
Glen: I can only say this… This reminds me about the old PC vs Amiga war back in the 80’s/90’s. ¤śē
February 23rd, 2009 at 2:32
Scrappy! You could buy a cheap 50mm standard and mount it with a ring converter in front of your zoom.
No damage, low price solution!
February 23rd, 2009 at 7:26
Hi Chris, nice work, i would be interested if you get the electrical connections workingat a distance. I am considering adding being able to control the lens from a PC instead of the camera, then operate the shutter remotely. But i still have the problem of getting at the signals and working out what they are.
February 23rd, 2009 at 11:51
I’m with the others here that say you should go find an old, fully-manual lens. I don’t know if this is possible with your current camera. I shoot with a Pentax (I know, not a Nikon or Canon, but I’m just getting started), and found an old Tamron “Adaptall” zoom/macro lens that is fully manual, aperture ring and all (Though with the right Adaptall mount, the Aperture could be chosen automatically). With a 2x teleconverter I can fill the shot with about 0.4 to 0.6 inches of subject from about 3 inches away.
February 23rd, 2009 at 14:19
i have to say that i tried it and it didnt work out too well. the depth of feild sucked
February 24th, 2009 at 9:38
Connectors? Wires? What are you going hook these wires to? 3v lithium cell? It just gets more and more rube goldberged or more like mickey moused. For gods sake use a lens with a manual capability. Most crappy amatuer photographers like uncle jack who swears he can shoot princess’ wedding and the only cost will be walmarts hillbilly express processing fees. Has enough sense to have a bulletproof fully manual 35mm camera that can produce kickass pictures from a bowl of fruit in a dim kitchen to horses crossing the tape for a photo finish. (Film+f/stop+shutter speed) come on people you start drilling and have wires soldered on connectors in a camera is a recipe for disaster. Plus if anyone gets a glimpse of your creation of the making of, they’ll swear you’re either certifiable or wacked out on drugs. Well cause you probably are now stop it!
February 26th, 2009 at 20:00
Give the guy a break.
March 7th, 2009 at 12:46
You can buy a decent set of macro lens adapters on eBay (http://shop.ebay.com/?_from=R40&_trksid=p0.m38.l1313&_nkw=close-up+lens&_sacat=See-All-Categories) for almost nothing. Image quality is bound to be a little less than the lens itself, but it’s negligible.
Here are a few sample photos taken with a Nikon D40X with a 10x macro adapter mounted on a Sigma 30mm at f/1.4:
http://purefiction.net/tmp/files/DSC_0022.jpg
http://purefiction.net/tmp/files/DSC_9966.jpg
http://purefiction.net/tmp/files/DSC_0004.jpg
http://purefiction.net/tmp/files/DSC_9970.jpg
http://purefiction.net/tmp/files/DSC_9981.jpg
March 9th, 2009 at 1:25
Hi Alex,
I agree and disagree.
Of course a commercial solution is ‘easier’ and ‘cleaner’ but there are two things you miss out on.
1. That’s no fun! Besides not being ‘that fun’ to twist on your purchased solution, it’s not available anytime. The reverse lens thingy is.
2. Compare the zoom factor. I don’t know what you’d get with your 10x macro adapter on an 18mm, but the posted solution here provides 4.5x magnification – on the sensor. That is an object will be 4.5 times larger when reflected on the sensor. That translates to an object of 1/5″ or 5mm filling the frame on an APC size sensor.
Did you take these pictures? DSC_0004.jpg is just great!
Cheers,
Chris