
Build your own Robotic WebCam |
By Jawed |
Overview
Here’s how to build a webcam that can be viewed and controlled from the web:
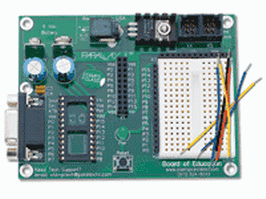 Parallax Basic Stamp 2 Starter Kit. This includes a board and a microcontroller with a BASIC interpreter. |
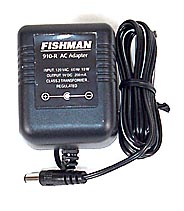 Notice the 9-Volt battery hook-up in the upper left corner of the board above. You’ll need a power supply like this one, but one that has the 9-Volt battery style connector. |
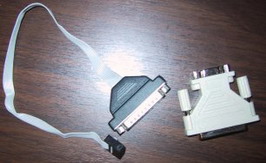 Obtain a cable adapter that allows you to get easy access to the 9 individual pins of your serial port, like the one on the left. I could only find one for 25-pin ports, so I needed the 25-to-9 pin adapter on the right. |
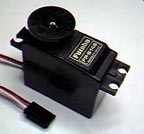 Futaba S-148 Servo. Your webcam will be mounted on top of the servo. |
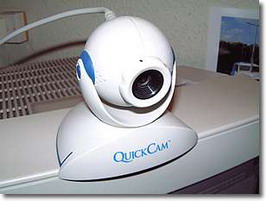 To stream live video directly from your computer, download the WebCam32 software. It allows you to show streaming video from a webpage by pointing the source URL directly at your own PC. You may have to open up the appropriate ports on your firewall. WebCam32 contains a Java applet which is automatically launched on the viewer’s browser. I recommend a Logitech WebCam. They’re around $100 or less. |
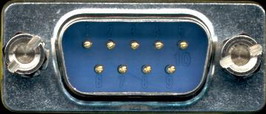 Connect the serial port’s pin 2 (Received Data) to the Basic Stamp’s pin 10. The Parallax Basic program will be waiting on pin 10 for one of three signals: L (left), C (center), R (right). Connect serial pin 5 (Ground) to the Basic Stamp’s Vss (Ground). |
Software
Where: webserver
Purpose: opens a socket and sends command to listener running on PC
Language: PHP
if (isSet($dir))
{
	$fp = fsockopen ("YOUR.IP.ADDR", 443, &$errno, &$errstr, 30);
	if (!$fp)
		die ($errstr);

	fputs ($fp, $dir);
	fclose ($fp);
}
|
Where: PC
Purpose: listens for incoming commands from PHP script and executes VBS scripts
Language: C++
#include "stdafx.h"
#include "afxsock.h"

CWinApp theApp;
using namespace std;

void failure (char *err)
{
	AfxMessageBox (err);
	exit (-1);
}

int _tmain(int argc, TCHAR* argv[], TCHAR* envp[])
{
	// initialize MFC and print and error on failure
	if (!AfxWinInit(::GetModuleHandle(NULL), NULL, ::GetCommandLine(), 0))
		failure ("Unable to init MFC!");

	// initialize sockets
	if (!AfxSocketInit ())
		failure ("Unable to init Winsock!");

	CSocket in;
	if (!in.Create (443))
		failure ("Unable to init Socket!");

	in.Listen (5);

	while (1)
	{
		// blocks until connection received
		CSocket newconn;
		BOOL rc = in.Accept (newconn);
		if (!rc)
		{
			printf ("ACCEPT ERROR!\n");
			continue;
		}

		struct tm *newtime;
		time_t aclock;

		time( &aclock );                 /* Get time in seconds */
		newtime = localtime( &aclock );  /* Convert time to struct */

		// get one byte
		char buf;
		int num_received = newconn.Receive (&buf, 1);

		newconn.Close ();

		if (num_received)
		{
			cout << asctime( newtime );

			switch (buf)
			{
				case 'R':
					printf ("RIGHT!\n");
					system ("RIGHT.vbs");
					break;
				case 'L':
					printf ("LEFT!\n");
					system ("LEFT.vbs");
					break;
				case 'C':
					printf ("CENTER!\n");
					system ("CENTER.vbs");
					break;

				default:
					printf ("ERROR!\n");
					break;
			}
		}
	}

	in.Close ();

	return 0;
}
|
Where: PC
Purpose: send signal “L”, “C”, or “R” on COM2 serial port
Language: Visual Basic Script (.vbs) (Why VBS? Because I couldn’t figure out how to do it in Win32.)
' CENTER.vbs
Set com = CreateObject ("MSCommLib.MSComm")
com.CommPort = 2
com.Settings = "9600,N,8,1"
com.PortOpen = True
com.Output = "C"
com.PortOpen = False

' LEFT.vbs
Set com = CreateObject ("MSCommLib.MSComm")
com.CommPort = 2
com.Settings = "9600,N,8,1"
com.PortOpen = True
com.Output = "L"
com.PortOpen = False

' RIGHT.vbs
Set com = CreateObject ("MSCommLib.MSComm")
com.CommPort = 2
com.Settings = "9600,N,8,1"
com.PortOpen = True
com.Output = "R"
com.PortOpen = False
|
Where: Parallax Basic Stamp 2
Purpose: sends pulse signal to servo motor according to received signal from serial port
Language: Parallax Basic
counter var     byte
revolveWait     con     30
letter var byte

counter =       0

read_input:
        ' get some data on pin 10
        serin 10\0, 16468,[letter]

        if letter = "L" then start_left
        if letter = "R" then start_right
        if letter = "C" then start_center


'START LEFT ROTATION
start_left
        counter = 0

left:
        pulsout 4,1500
        pause 20

        counter = counter + 1

        if counter > revolveWait then read_input
        goto left

'START RIGHT ROTATION
start_right:
        counter = 0

right:
        pulsout 4,1
        pause 20

        counter = counter + 1

        if counter > revolveWait then read_input
        goto right

'CENTER SERVO
start_center:
        counter = 0

center:
        pulsout 4,600
        pause 20

        counter = counter + 1

        if counter > revolveWait then read_input
        goto center
|
You must be logged in to post a comment.
Help us continue our work with a donation
18 queries. 0.225 seconds
April 26th, 2007 at 9:58
hi,
i want to know how i can make the c++ program and the vb program executable
April 15th, 2008 at 13:47
hi all , plz i want the c++ code for the webcam becouse i want to use it in a robotic project , so if you can help me with this , plz send the code to my E-mail: ( the_bad_killer@hotmail.com )
hope to c your rely
thx
zaid ghanem
September 15th, 2008 at 12:26
have you got any ideas in how to put a camera in laptop so its built in, if so where do you get the camera form. i want my laptop to have builtmin camera and i want to build it in myself. i wnat it to be built in like appple mac/laptop camera
September 15th, 2008 at 12:26
have you got any ideas in how to put a camera in laptop so its built in, if so where do you get the camera form. i want my laptop to have builtmin camera and i want to build it in myself. i wnat it to be built in like appple mac/laptop camera
September 15th, 2008 at 12:26
have you got any ideas in how to put a camera in laptop so its built in, if so where do you get the camera form. i want my laptop to have builtmin camera and i want to build it in myself. i wnat it to be built in like appple mac/laptop camera