
 Sometimes you do things and you keep on doing them and you forget that you’re actually are doing something special. This is the case with the way that I always organize my cables and a colleague of mine (let’s call him Tony as that is actually his name) mentioned the other day ‘Hey – what can’t I find that on Grynx?’. That’s actually a good question… Hence this article. A large problem today with computers, iPAQ’s, iPOD’s, laptops and such are – cables. So you try to clean it up and tie them up with tie strips or Velcro bands, but then they’re stuck. And you try to move a keyboard or a monitor and then what happens? You end up cutting up the tie strips or loosening the Velcro bands and reconnecting everything. Not very practical… And what about all these cables that are not permanent but not temporary?
|
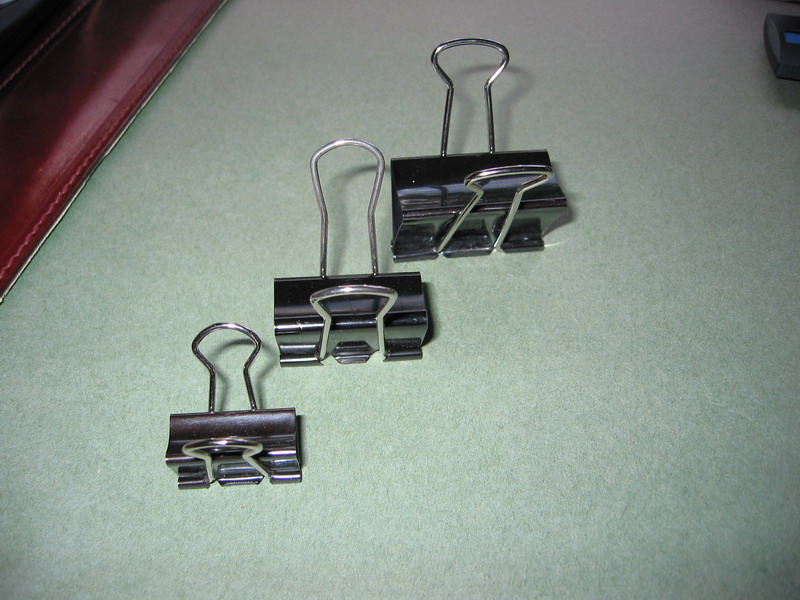 The solution that I’ve been using for a long time are binder clips, you know these black clips that are used to keep large amounts of papers at the office. The reason for using these are several and a few of them are:
They are available in different versions, as the bulldog clip that pinches I’m going to show how you make those cables that always slide behind the desk become easily available and yet neatly tucked away. |
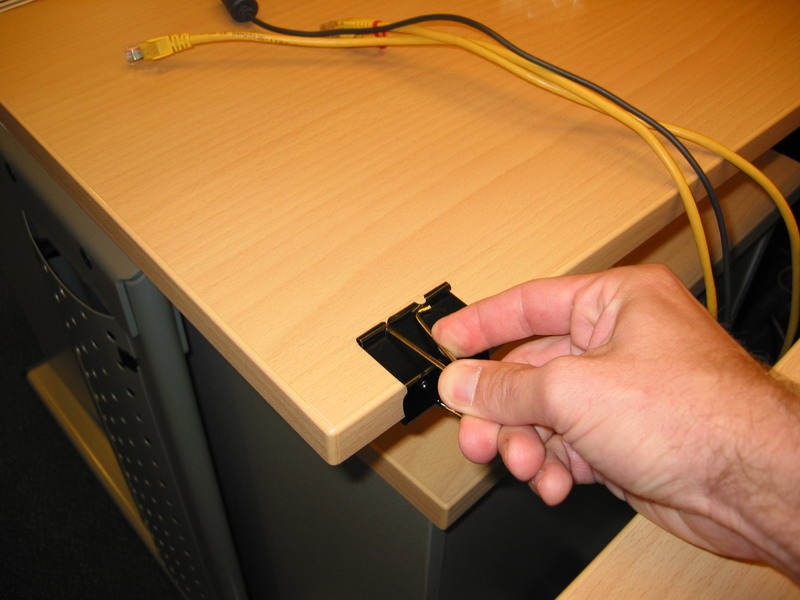
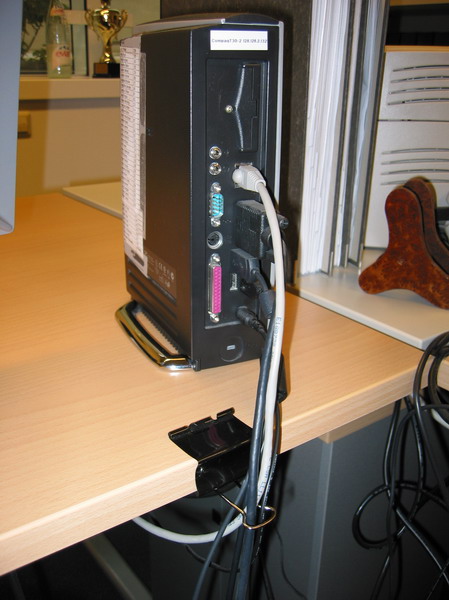
 You will need one binder clip that is thick enough to fit over the end of your desk. So If you have a desk that is 20mm think (roughly 3/4") then you take a clip that is 50mm wide (that’s the standard big 2" one). The L├ā┬żkerol is optional but helps. |
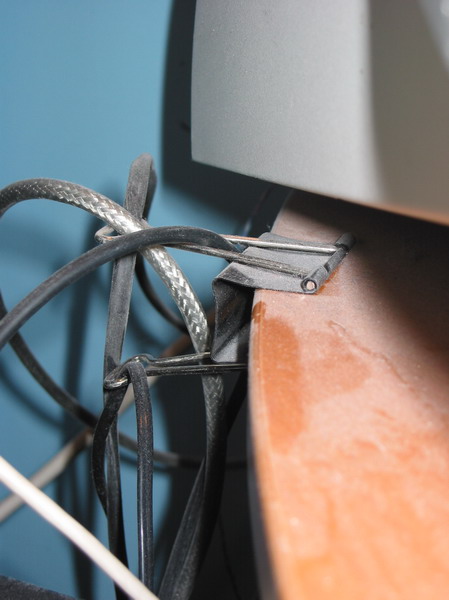
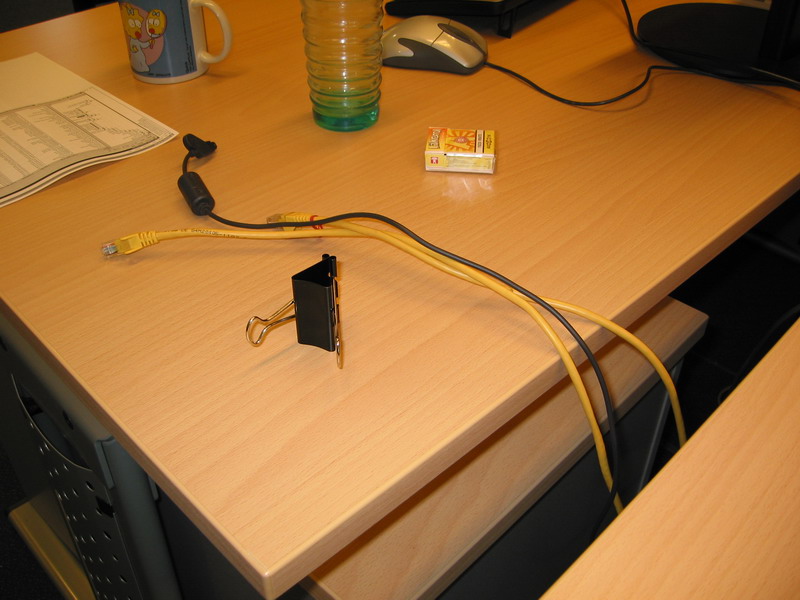
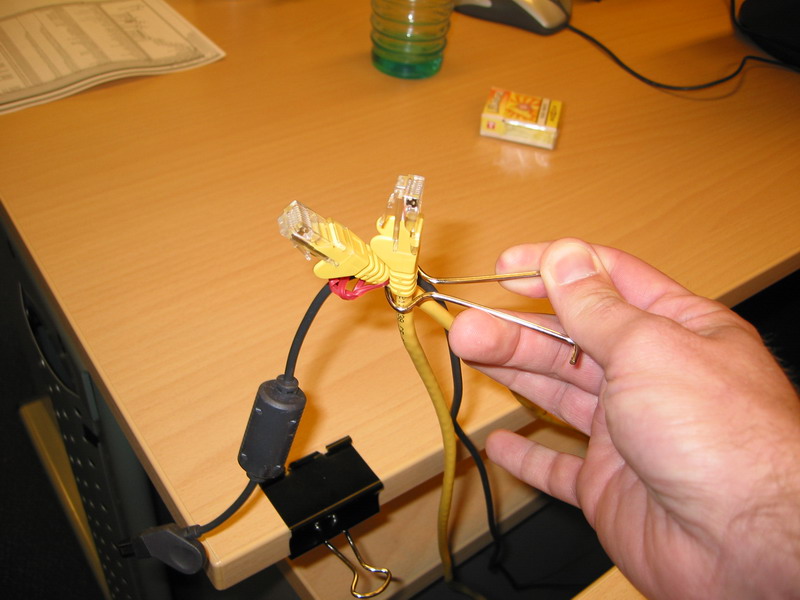
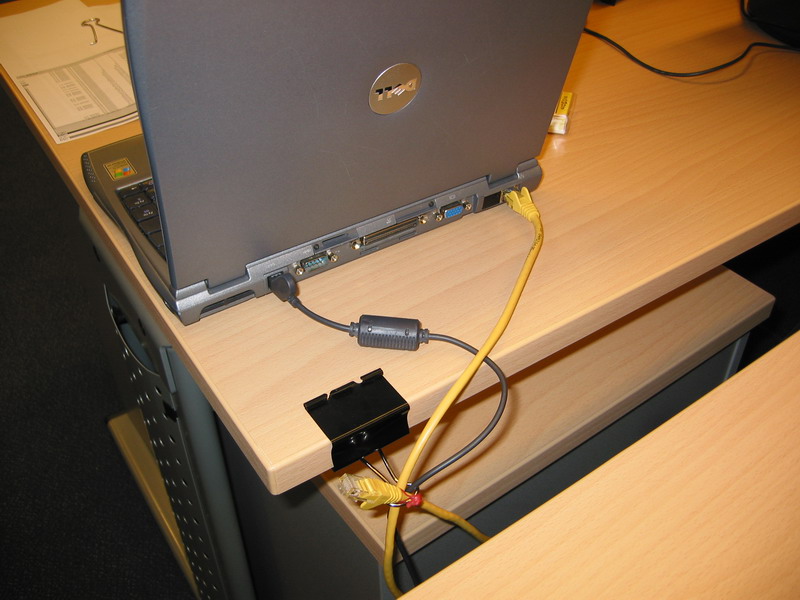
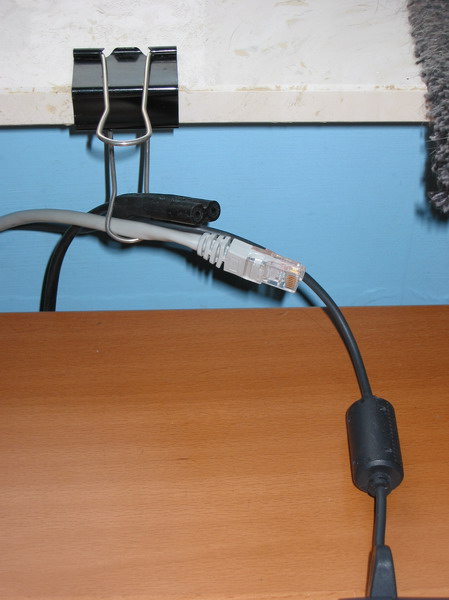
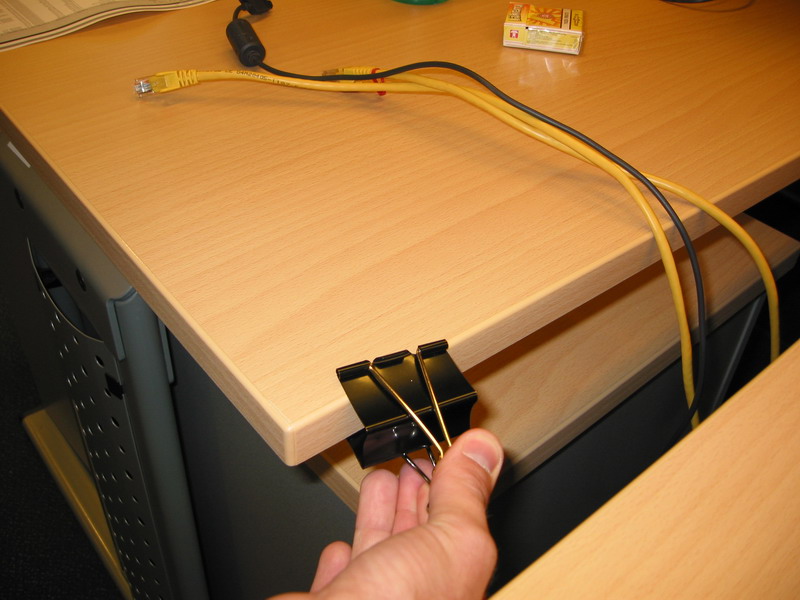 Attach the binder clip where you want that have you cables hanging behind your desk. Now remove the clip arm as shown in the picture and have you cables run through the hole so to speak. I prefer to try to fit the cables through the little loop at the top of the arm but there is nothing stopping you fill more or less the whole space available with cables. But the more cables the less smoothly the cables will ‘fall back’ behind the desk when you let go of them. |
|
|
 And attach the arm again. And – Voila! You’re done. Now here’s something to think about. I usually remove the top arm and attach the cables on the lower arm as this will make the cables hang a couple of cm below the surface of the table. |
 Using something as ordinary as a binder clip to attach your messy cables can really impress people. First they usually just define you as insane – then they’ll see the ingenious in the idea. And why stop there? You can probably find more ways to make use of binder clips attached to things. Let me know about them! Then I can sell the solution to the cheap manufacturing company in China and earn millions ¤śĆ Moahhhaahahaha {Mad scientist laught} |
|

|
|
|
You must be logged in to post a comment.
Help us continue our work with a donation
 Forum {beta} Forum {beta}Hatch ideas and help others with their ideas. |


18 queries. 0.229 seconds
July 5th, 2006 at 19:47
Hi. Yep, good idea which works well. I’ve just looped the cables through the “jaw” of the clip & clipped it onto something.
Using the arms is clever.
You can get stainless steel ones (we bought some for use in our laboratory at work) but they were very very expensive.
Benjamin
July 12th, 2006 at 7:05
Great idea. I’ve now got the cable of my Dell Axim put away where my pet rat can’t get to it… Thanks!
July 24th, 2006 at 10:44
I’ve got another solution for cable mess. At http://tinyurl.com/mrrkl you will see industrial, open slot trunking with a lid. It’s 50mm high, 50mm wide (i.e. roughly 2″x2″) with slots and a lid.
It has an incredible amount of uses: tidy cables under the desk, duct cables up a table leg, trunk complex cable setups over the wall (speaker, sat, aerial, network – and that’s just one side of my workroom :-). Best of all, if you want to change something you just rip the lid off and get on with it. Lid back inplace and presto – all tidy again.
Worth buying a couple, it’s industrial stuff so it’s likely to be available at your local ‘pro’ electricity wholesales. PB
September 29th, 2006 at 21:30
Adopted – works great, nice pointer.