
Making a iPAQ cradle car vent mount |
By Christoffer J├ā┬żrn├ā┬źker |
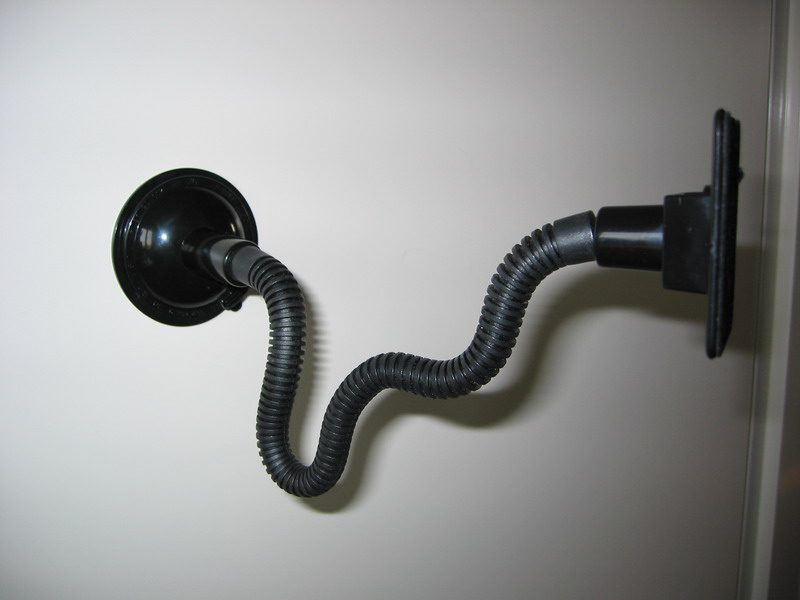 I bought myself an iPAQ hx4700 last Christmas, together with a swan neck car mount kit as I needed something that would fit in my two cars as well as something that could fit into other cars I drove. The swan neck is perfect as you can mount it everywhere, but it’s not only ugly, it’s also bulky and unstable as it’s quiet long. I try to bend it in such a way that I create a downwards tension so that it presses the iPAQ holder to the dashboard. That does work in most situations after adjusting it a couple of times, but it doesn’t take away the ‘un-handiness’. And it’s also located in my view of the window which might not be that good out of a safety stand point. |
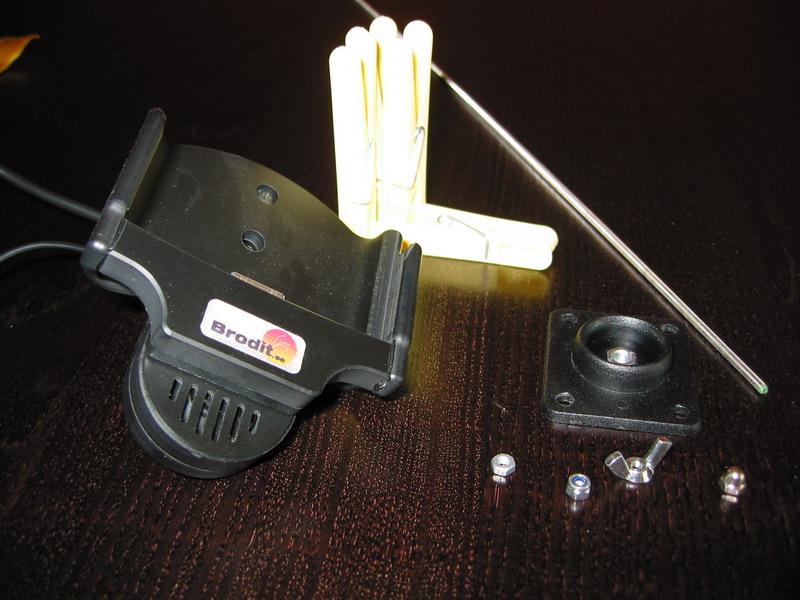 I started looking around for solutions to mount my iPAQ in a nicer way. Basically you have three solutions available. 1. A suction device like the swan neck. No thanks! 2. Screw it into the dashboard or a plate that is attached to the dash board. Nice, but very permanent. 3. Vent mounts, clicks on to the ventilation outlet in you car and can be moved. Yes! Want one of those!! Nagging as I am, I found two major reasons for why the available vent mounts were not good enough. 1. The stable ones are specifically made for one brand and model of car, so it can’t be moved (unless you have three cars of the same model). So, I decided to build my own – with the help of some nuts and bolts and washing |
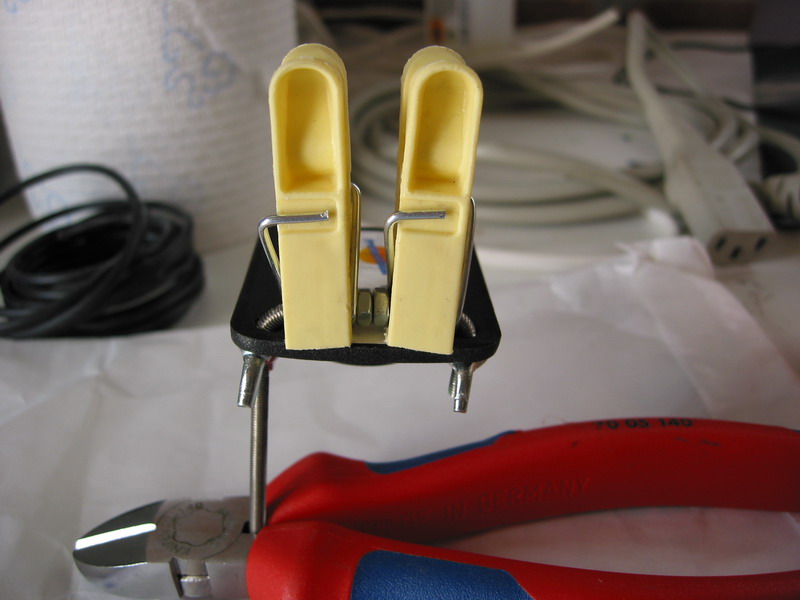
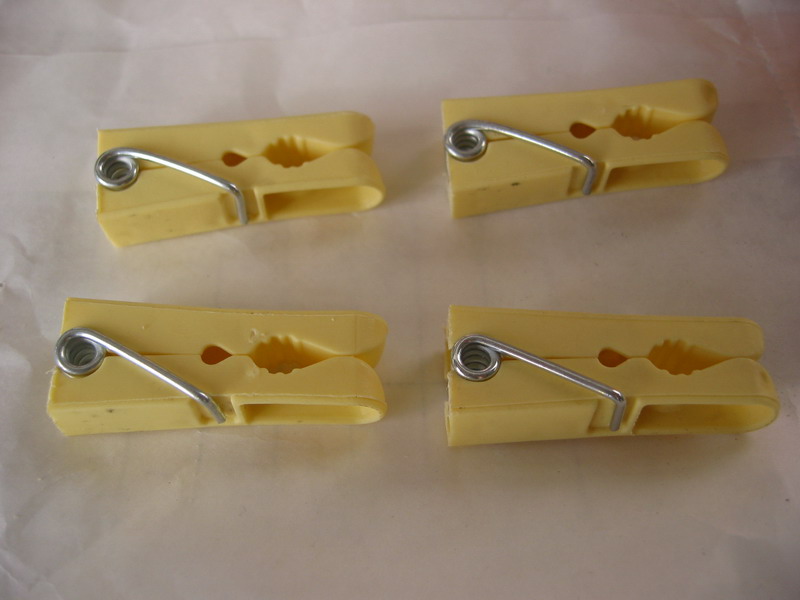 Start with shortening the pegs as on this picture. It’s important that they are levelled with the spring as they will rest against the back of my existing iPAQ holder. The whole idea is to then put two of them at the top and two at the bottom of the back of the mounting plate. By then running the two bent bolts trough the pegs they’ll be fixed very hard. By the nature of plastic and the design of the peg they’ll be allowed to flex a bit, up to 5mm, in all directions. This is important as I want this kit to be mountable in as many cars as possible and the vents in different cars have different spacing. |
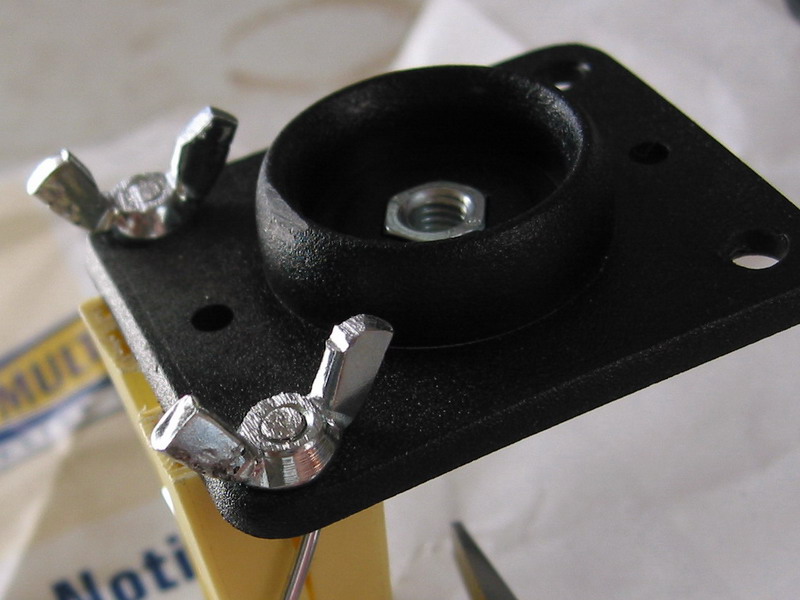
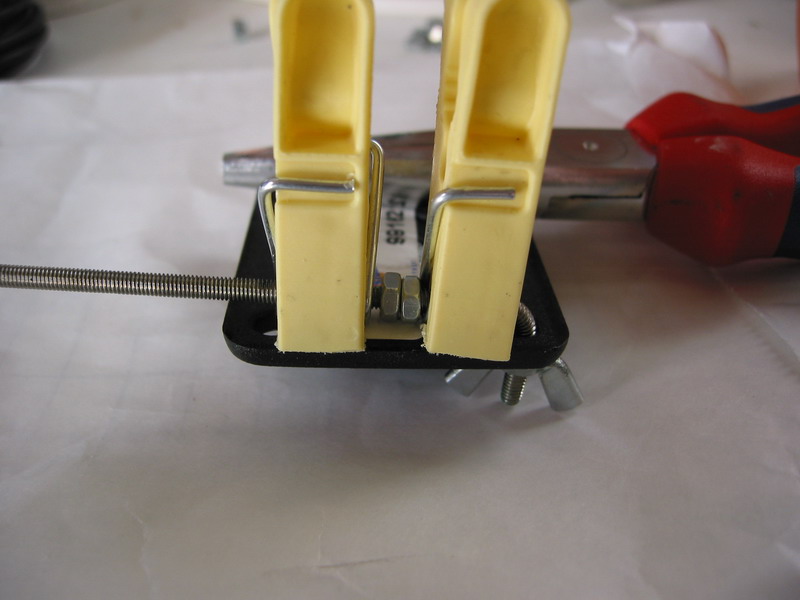 If you look at this picture you’ll see that I’ve mounted a wing nut instead of a regular nut. The reasons for this are a couple, starting with that they are so much easier to work with in terms of tightening and loosening but they also are very important when it comes to sawing through the bolt. If you saw trough a bolt you will damage the threads and you will more then likely have a big problem to get nuts on the bolt. But by mounting a nut inside of the cut on the bolt you can salvage the damaged threads as you then can unscrew it after the bolt is cut. A wing nut will also come in handy when we need to shorten the already mounted bolts in the holder. |
 Notice the two nuts between the pegs, they’re simply there to push them apart. One problem that I noticed when making the second bend, was that bending it was easier said then done. I’ve used an M3 bolt here and even though it’s only 3mm wide it’s hard enough to be problematic when bending. To solve this you can first saw a jack 1/3 into the bolt where you want it to bend. This will provide a structural weakness and the bolt will fold just there. |
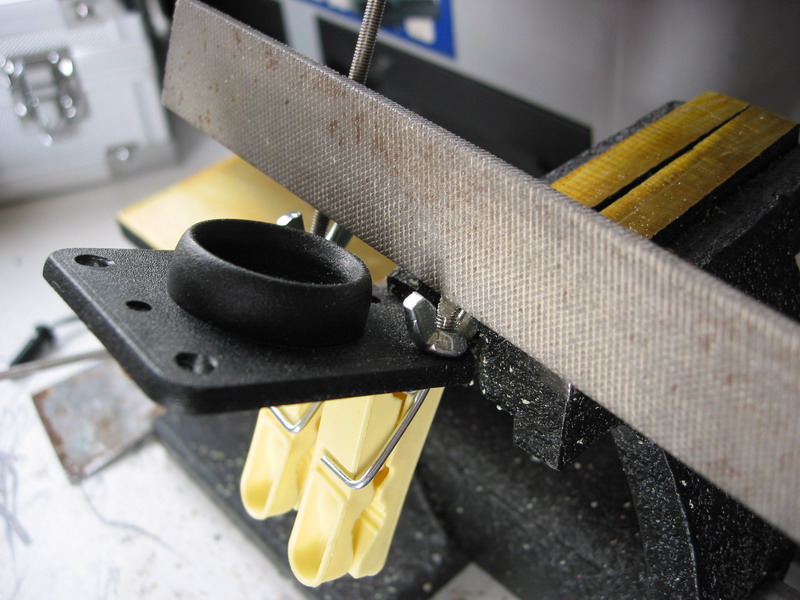 Okay, now tighten the wing nuts hard but not so hard that the pegs start to deform. Mount the holder by the wing nut in the vice and file down the end of the bolts until they’re levelled with the nut. |
 That’s about how it should look. The bolts are now not higher then they need to be and we can then use the nice closed nuts. |
 And finally we mount the closed nuts and of course we need to do the other side. Don’t worry to much about the looks of this ‘monster’ as 50% of it will sink into the vent and the rest will be covered by your PDA. |
 Here’s a front view of my iPAQ cradle mounted in our dinky toy car. Attaching it was as easy as I wanted. Just align the pegs to the vent and push and they’ll slide into their position without a problem. Remember to turn off the vent if driving in the winter. You don’t want to overheat you PDA. |
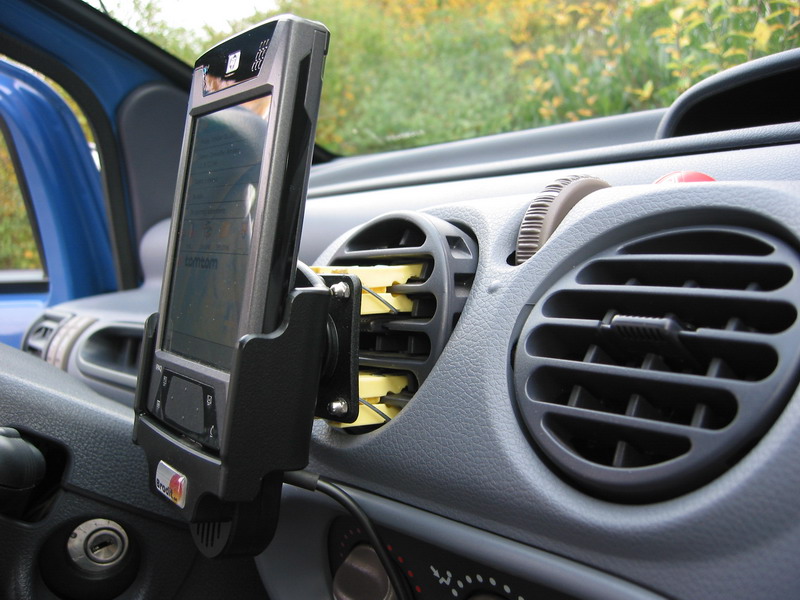 Here you have a nice side view of what you’d see if your passenger bend forward to peek behind you iPAQ. Yellow was maybe not the right choice for me after all. I must say that I’m very impressed about the stability of this creation. After driving for about an hour with it mounted it was still in exactly the same position. And even better – my iPAQ never ever vibrated!!! I actually did expect it to vibrate a bit every now and then but it was as still as if the car was parked all the time. |
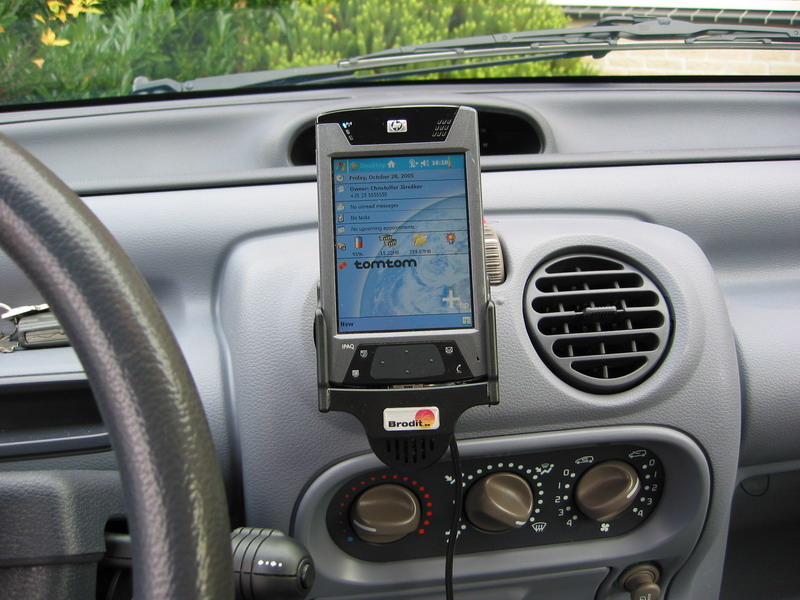 Here’s the last picture I took. The iPAQ is in a perfect position where I can reach it without a hassle as well as it doesn’t obstruct the view. Now I just need to solve the problem with the the sound from the iPAQ to the car stereo… |
You must be logged in to post a comment.
Help us continue our work with a donation
 Forum {beta} Forum {beta}Hatch ideas and help others with their ideas. |


18 queries. 0.078 seconds
November 2nd, 2005 at 13:44
Mounting a iPAQ cradle car vent mount
I love this hack because it combines a proper iPAQ mount with four washing line pegs to make a car vent cradle for the iPAQ! Interesting hack – but as with anything that you fix to your vehicle, make sure…
November 4th, 2005 at 21:28
Mount your iPAQ in the car with pegs
For those of you who have Pocket PC, specifically the iPAQ – here’s a good how to on mounting your iPAQ in the car with washing line pegs in the ventilation outlet. I’ve seen versions of these sell for $30+ and this looks like it will work better. Link.
November 24th, 2005 at 15:38
Excellent hack! Too bad that outer blades on my car’s vent are vertical, not horizontal,
and the peg just slides down on those. Oh well, I’ll keep looking…
August 27th, 2007 at 10:48
what a shity idea not worth it ,by proper and nice looking mount just 4 few box fuss free
September 25th, 2007 at 19:10
Doesn’t this block the airflow from the vent?
January 7th, 2008 at 9:46
Nice mount….stu, of course it blocks the one vent’s airflow….the other vents will have to suffice. It is either that, or else attach something to your windshield (ugh) or to your dashboard (i agree – too permanent).
i think this is a good tradeoff….and i love the KNIPEX pliers i see in your pics, they are awesome tools!!!